


🪟 Transform your windows, transform your vibe—cool, clear, and protected!
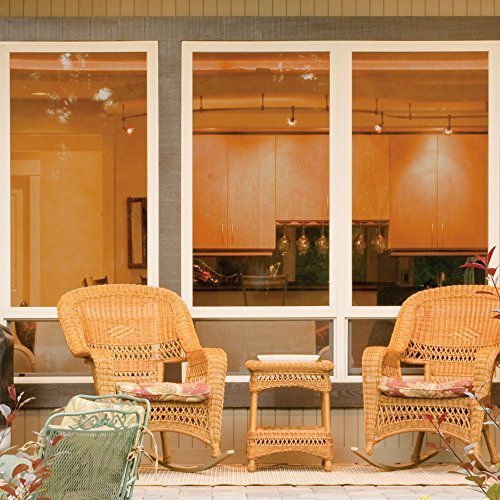
Gila Heat Control Light Gray Adhesive Window Film is a premium DIY solution designed to reduce solar heat by 57%, cut glare by 53%, and block 99% of UV rays. Its nearly invisible light gray tint maintains natural light and outdoor views while enhancing indoor comfort and energy efficiency. The durable peel-and-stick film comes in a generous 100ft roll, perfect for large residential projects, and offers easy installation with a 24-36 hour adjustment window for a flawless finish.


| Brand | Gila |
| Color | Gray |
| Installation Type | Peel and Stick |
| Material | Adhesive |
| Product Dimensions | 36"L x 1200"W |
| Size | 36" x 100' |
J**N
Easy installation, excellent energy savings and increased comfort!
First and foremost I have to share that this film came well packaged in a box that included a spool that allowed me to dispense it in an easy manner which really helped facilitate cutting and sizing. The film width was more than enough for the windows and sliding glass doors in our home so rather than worrying about cutting the film as the manufacturer suggested with the 1 inch border added to the window measurements I left the excess on the sides and cut to the window measurements minus 1/16 on the top and bottom so that once applied the film only needed to be cut at the sides. In order to achieve a professional result a professional set up is always beneficial. I took the time to try and set up the most convenient and efficient way to handle, cut and prepare the film prior to applying it to my windows. I used a folding table about 75 inches long that we had as my cutting and spraying station. I used a permanent marker to lay out cutting templates for each window so that I would be able to line up one of the factory edges (one of the sides) along one of the lines I drew which allowed me to make proper measurements, cut with less waste and have a sure fit each time. I measured all my windows in advance and worked on all the ones with the same measurements before moving on to windows with different dimensions. This allowed me to cut enough sheets of film in succession and lay them aside. Once cut I could then clean off the window, return to the table and prep the film with the spray. When spraying the film before application I would peel the backing from the film, use blue painter's tape to hold down that corner and peel away the backing. I then would use more painters tape to secure the film and sprayed it with the solution as I removed the rest of the backing. Since I allowed for extra space on the sides of the film I used one of these sides as the anchor point with the painter's tape so that if any residue from the tape did get onto the film it wouldn't matter since this section would be cut off once the film was applied to the window. The kit that Gila offers is essential and includes a bottle of spray, a squeegee to help apply the film and remove excess solution and air bubbles, a cutting blade and lint free cloth. The kit is worth buying for the solution and the squeegee alone. I did not use the cutting blade nor the cloth and chose instead to use my own washable lint free cloths and standard razor blades for cutting. The blade that is included is fixed at an awkward angle which tends to tear the film. I tested the blade on a small window in our bathroom and it did indeed tear the film. Regular razor blades, changed often is best. I chose to change the blades for cutting the film to size about every 10 cuts and when trimming the film once it was applied to the windows every 2 windows as this seemed to be the best to prevent snags. For some reason the film and solution dull razor blades pretty rapidly so its best to change out your blade regularly rather than waste both the film and your time having a dull blade tear your film. I've read on here that some people make their own solution with soap and water but honestly I didn't bother with that and won't if I have to do this again. Considering the time invested in this type of project I felt it a reasonable cost to simply buy the solution. I laid down enough film to cover 16 standard windows top and bottom panes, a small bathroom window, 2 sets of sliding doors, 2 decorative front door windows and even doubled the film in our master bedroom which is exposed to sunlight the majority of the day. With this much square footage laid down I only used 1 and a half bottles of the Gila solution and I used the solution as instructed by Gila which means using it to clean the windows as well as an application solution for on the film and windows. I purchased the solution at our local Home Depot and the kit and an extra bottle only cost use $18. My suggestions for a stress free application process would be to take the time to set up an area that can be used to cut and prep the film. If you can set up a table and make some guide lines for cutting and sizing it can make all the difference in my opinion - when you go somewhere to have this type of film cut its done with by machine or on a table that has all the measurements marked out and straight edges to ensure proper sizing so it pays to emulate this type of set up. Make sure you have plenty of blades and solution and use painter's tape to hold down your film while cutting to dimension and while removing the backing. Don't be excessive with the solution and only use enough to wet the entire surface of the film. If your film is literally running and dripping with solution use less next time. Go slow when removing the backing of the film to avoid creasing it which leaves some nasty marks you won't notice until you have taken the time to put it on your window. The squeegee in the kit is an essential tool and while I have several around the house the Gila one really is designed for this particular job and works very well. I know that some people complain that this type of film is hard to apply or tears easily and opt instead for cling films. This film when handled properly does not tear and over the course of a week I took to casually apply this film to all our windows/doors I did not have a single tear. WIth patience and care you really can accomplish a professional result. The great thing about this film is that you have 24-36 hours to make adjustments or remove the film from the window. Gila states in 24 hours the film can still be handled and I have made small revisions to the film such as removing excess solution or air bubbles I missed during the first application within the first 36 hours. So in the end patience and preparation can save you a considerable amount of money if you choose to apply this film yourself. I called a local company for a quote and the cost to have our home professionally handled was upwards of $600 and we would be on a wait list that was nearly 3 weeks long. And as far as the film helping with reduction of energy costs and reducing heat transfer into the home, we are happy with the results. Our master bath and kitchen literally felt like the heat was on when you walked past them when it was sunny out. The heat transfer in those two rooms was terrible initially but after applying the film we noticed a significant difference in these two rooms. Now they both feel as comfortable as the rest of the house.
D**R
Excellent DIY upgrade for old windows. Conditionally recommended
I bought an older home that was a bit of an efficiency disaster. Old and inadequate insulation, single pane windows, poor attic venting were my biggest offenders. I knew windows were expensive, but I wasn't expecting to get a $20k quote back FOR A SINGLE ROOM. Sure, it has several 8' x 4' picture windows, but the ROI for the windows was not going to be anytime inside of my lifetime. I got a company to give me a quote on low-e film installation, and it was not reasonable either (in my opinion). I purchased Gila Heat Control Light Gray Adhesive Residential DIY Window Film, a starter application kit, several extra bottles of solution, and decided to do it myself. After putting this film on several windows and doors, I have some observations. First of all, the film is great. Once installed, the film dramatically cuts down on the heat the heat the windows were previously responsible for. With no other changes the film dropped my electricity bill by about $150/mo. in the summer months. That's a very large, energy inefficient house in Houston's sun - YMMV. Second, this film has the nice side benefit of stopping indoor sun bleaching of flooring and fabrics. Third, this film does tint the windows and cut down on some of the visible light. This doesn't bother me, but it is something to keep in mind if you are big on your natural light. Finally, the film is more or less reflective from the outside when the outdoor light exceeds the indoor light... and it's not reflective at all when it's brighter indoors. So, now that you know what it will do for you, let's get into the installation. The film comes on a large roll, and it helps to keep the box as a dispenser. Aside from protecting the film, it does act as a bit of a straight edge for cutting off of the roll. When you actually want to install some film, you will clean the window as well as you can, being sure to make sure no lint or fibers are left behind. Gila has an installation starter kit with a good cloth to use for this. You will also want to make sure that you install the film when it's light outside, BUT WHEN NO DIRECT SUNLIGHT IS ON THE WINDOW! This is very important, as it makes it very difficult to keep enough of the solution between the film and the glass. Having ambient light makes it much easier to see bubbles. I installed about half of my windows only cutting the film to length, but have found it easier to cut the pieces to the approximate length and width (especially for deep sills). You can use tape to peel apart the backing from the film. It really helps to have two people fir the installation, but I did most of my windows alone. You spray the window with the application solution (from the top down, as it flows down anyway), but you have to be quick about it. Once you've placed the film, you squeegee the air bubbles and solution out from the top-middle, out the sides, and then down the center and out the sides (bit by bit, down the length). The solution and the squeegee are also in the starter kit, though I'm sure there are other options. After wiping down the excess solution at the window frame, I trim the film back to about 1/4" from the edge of the glass. I use a metal straight edge that's backed in cork, so it doesn't scratch the film. The metal part is handy because I use a razor blade to trim the film. I DON'T use the cutter in the starter kit, because it's awful. Glass is very had and will dull your razor quickly... change the razor out pretty frequently. I leave a 1/4" margin because of how my windows are secured into the frame. There's adhesive that makes the surface irregular at the very edge, plus you do need some room to get the excess solution out. Depending on your windows, you may leave smaller margins, but I'd resist the urge to go all the way to the edge, as it may peel or bubble at the edge with thermal expansion and contraction of the glass. The smaller the glass surface, the easier it will be to apply the film. For anything over 8 sqft, I'd recommend having another person on hand. I did several of the 8' x 4' picture windows by myself (with a 48" Gila roll), and I did it by peeling back the backing only at the top of the sheet. Once the top was placed, I temporarily taped it in place. I peeled the backing down the sheet a foot at a time, spraying behind the film as I went. You can do it, but I'd be lying if I said it was easy or time efficient. Bribe a friend with a pizza or alcohol and it will go much faster, and probably with better results. What's a bad result? Well, I ended up junking about 5 windows worth of film. I accidentally creased the film. I accidentally had the film's adhesive contact another part of the film's adhesive (which creates a surface imperfection you can't do anything about), I accidentally cut a piece too small, and I had bubbles I couldn't do anything about post-installation. Almost all of these problems can be avoided by using two people. Sometimes, though, stuff happens... and that's when you're glad you bought a hundred feet of this stuff. Personally, I think this is a no-brainer for anyone who doesn't already have low-e windows. I would buy the installation kit, and 2 extra bottles of solution per 100' roll. An extra squeegee is a good idea if you've got help. The only reason I've only given a conditional recommendation is because installation isn't easy. If you've got two people, and you follow what I've written above, it's not really all that HARD either. The main thing to keep in mind is that not everyone does tasks like this well. It's sort of like the subset of the population that has problems assembling Ikea furniture. I suspect there may be a convergence on the Venn diagram. However, if you've done basic home DIY stuff before, you can probably do this, too. I just suggest starting with smaller windows and refining your technique on those. Conditionally recommended.
A**N
Pretty easy to do, just takes patience and some attention to detail.
My house has a eight south facing windows in our main room. They're older, contractor grade and would heat up a ton when in direct sunlight. My upstairs was basically the same temp as outside from the heat coming through those windows and flowing up. So far, I've done six of them with this product, and plan to do the rest, and my north windows as well. I have a couple observations for anyone considering doing this. First, you can totally do it by yourself if the window is less than 3ft tall, or less than 2ft wide but tall. The instructions on the box suck, watch the video and read the paper copy hidden in the roll of film. Surface prep is important. Use windex, a microfiber towel (get a bulk pack) and a disposable razor to get everything off the glass including the corners. Do all the prep before you start working with the film. I started trying to do all my cuts and stuff on the kitchen island, but ended up working on the tile/epoxy floor for logistical reasons. When you unroll the film, unroll it with the adhesive cover side up, and the film against the ground. Use some packing tape, or double stick tape and attach the film side to the ground on one end (the top). Unroll as much length as you need and use something to hold the free end of the film down. I used a wooden yard stick. Cut your length and put the roll away. The soap solution works well, is clear and doesn't stain anything so don't worry about spilling it on anything. After spraying the window liberally, I started removing the protective cover at the side I had attached to the ground (the top), spraying soap solution liberally every 3-4 inches of unrolling. (as others have said, packing tape handle on the film, packing tape handle on the cover, pull apart works great.) Since the adhesive is exposed, it's important to turn off any fans, and keep the adhesive wet. After the protective layer is removed, the soap weighs enough to keep the section from coiling back up. Since you cut a section larger than your window, I'd start installation by grab the film corners (on the bottom of the section) directly touching the adhesive. Pick it up while you stand up, and detach the tape from the floor. Go to your window, line up the film edge you're holding slightly above the top of the window and stick it on. Since your film section is larger than the window, and you're going to trim off the excess anyway, I focused more on getting a good fit in the middle of the window and squeegeeing my way to the edge before trimming off the excess with the cutter tool they sell and then doing touch ups. A rubber squeegee helps a lot here, but you can absolutely do it with a credit card, or the tool. I kept a couple microfiber cloths around to help mop up the excess soap that I was pushing out during the process and that helped a ton. At first i was really paranoid about accidentally trimming too much/to early but in practice I haven't found that to be an issue. Once the center is adhered well, trim the top, keep squeegeeing, trim the left, trim the right, trim the bottom and keep squeegeeing. I had to modify that routine for a couple windows and start trimming on the left and right due to gravity, but at the end of the day, as long as the center is adhered, the film isn't going to shift while you're removing air bubbles or excess fluid. I think using a rubber squeegee for the first pass, getting everything adhered, and shifting to a card squeegee is probably your best bet. My first window was too small for my rubber squeegee, so I did the 1.5ftx6ft window with just the card squeegee. It took a while, but at the end of the day it worked. Figuring out your work space for removing the layer from the adhesive is the hardest part, but again; Be liberal with the soap and don't worry about making a mess. It's dye free, and will not stain anything. For my upstairs, I realized I'm going to need to use some folding tables as my workspace due to only having carpet up here. In terms of real world results, so far I've noticed a significant reduction in heat already. It's 96F outside right now, and it would normally be 90ish up here, but it's only 85F. I need to work on the attic of course, but every little bit helps, and it's practically an invisible upgrade. Any weekend DIYer or professional home owner can do this; just follow the actual instructions not the abbreviated ones on the box. I used the legit installation tools/solutions for what it's worth. EDIT: I started with the 18ft rolls, and ended up ordering a 100ft roll after some additional windows got slated for film coverage. The 18ft rolls are pretty unwieldy but the 100ft roll comes on a giant spool like a roll of aluminum foil. I was worried the 100ft was going to come loose, but it's well packaged on the spool. I would suggest getting a single 18ft roll, to try it out, and then get a 100ft spool for the bulk of your project.
K**Y
Low quality tint.
Pretty disappointed with this product. As much as it cost I would expect a higher quality. One week after installation the edges are still peeling and not adhering properly. I wouldn’t put this in my home again. If I didn’t buy so many rolls and spend so many hours putting it on my windows I would rip it off and go with a different product. The clarity of this tint isn’t very good. It almost makes the window look grainy and hard to see out of. Yes I know it’s a darker shade but it should be a crystal clear darker shade. It helped with shielding some of the heat coming through but not enough in my opinion. Also if you’re installing this tint after you peel the clear layer off do not let the back touch anything or it’s ruined. At night this tint also puts a mirror effect inside the house where you can’t see anything outside at all. I would go with a higher quality product if I had to do it all over again, which I just may.
T**L
Cuts down on the UV heat coming through, works as advertised.
This film definitely cuts down on the heat that comes through the window via sunlight and warms up the room - that cooking feeling you get when you stand in front of a window on a bright sunny day. This UV reduction will keep the room a little cooler and more comfortable-it's clearly better than before, and was worth the time to apply. It does darken the windows just a bit, giving them a slight bluish tinge, but you probably will not notice it much unless you have a window without the film in the same room, and frankly, the cutdown on glare is a plus. Note that this only cuts down on the UV heat-and that's all it is designed to do - it does NOT do anything about the heat (or cold in winter) that directly travels though a window surface because you have an old single-paned window with gaps around it. Touch the window and it will still feel hot, and you'll still feel warmer near the window, just without the "cooking feel". Application was not difficult, but requires meticulous preparation and carefulness. Proper preparation means cleaning with window cleaner multiple times, and scraping off any stick-on dirt and paint flecks with a razor. Cleaning up the window edges of dust and paint is critical as well-you want a pretty clean edge all the way around. Each bit of dust or dirt or paint on the window will cause a bubble in the film, and if the edges of the window are not clean, the edges of the film might not stick down to the glass. You will still probably end up with a few specks of dirt or dust on there under the film, despite your best efforts-if it's going to upset you that it's not 100% perfect you might not want to apply this film at all or get a pro. Overall, if you don't take the time to clean and scrape and search for dirt, it will come out terrible. If you do, it should come out pretty well.
O**Y
Excellent Product, fairly easy installation with a helper and lots of spray solution
My fiance and I just bought a house in St. Petersburg Florida. Our new home has huge windows (double paned) and about fifty feet of exposed eastern exposure that just bakes for half the day, so much so it was uncomfortable to sit in the living room even with blinds drawn until late afternoon when the sun had passed over head. By that time the house had heated up so much that the a/c was struggling and our first several electric bills in the summer showed it ($300 +). With only roughly 30% of our windows now covered (our entire eastern exposure) with the film we can already feel a huge difference that we hope will be reflected in our electric bills to come. Its nice that the film is NOT overly dark or Super reflective, I didnt want our home to be a cave or look like a house of mirrors from the outside, but the light heat control tint seems to be a nice mixture of heat reducing and tint while still allowing pleasant light in during mid day. Things you will need; a few sizes of razor knives or exacto blades, a squegee or two, scotch tape, a tape measure, a large table that you can put a piece of cardboard down to make cuts on (we used our dining room table and we were just careful) A large Drywall t-square is also very helpful to make true cuts or at least a metal yard stick, and a helper to peel the backing away and spray down the adhesive side of the film (IMPORTANT SO IT DOESNT STICK TO ITSELF) The best advice I can give you is obsessively clean the window with a razor blade and squeegee prior to installation, then do it again, hairs and window schmutz will be very visable after installation and buy plenty of the spray solution or use distilled water and a few drops of baby shampoo. You CANNOT use too much spray solution. Spray the window, the film as you remove the backing and the back of the film after it is applied and you squeegee it in to place. After a window or two you will get the hang of it, watch the videos on Gila's website or on youtube by every day people doing it, it helps a lot to see someone else do it before you start.
F**A
Relax, it takes patience
I live in Southern California where the temps get into the 90s-100s in the summer and recently tinted my south and west facing windows. A handyman friend showed me multiple times how to apply the film. I bought and applied 6 rolls LEG361 Heat Control Residential Window Film, on roughly 19 windows. It does require two people to apply. Beware of static after separating the film from the tint . The largest time waster was trying to separate the plastic film from the backing. The process was simple: Measure the dimensions of your window; cut a piece 2-3" greater than the height and width of your window Measure and cut the tint and lay it out on a flat surface in the sun. Apply in 70-80 degree weather. Clean the glass--remove paint and dirt droplets with a razor if necessary to get a clean surface. Spray the window with the water/soap solution, Separate the Tint from the plastic backing; when you are about ready to place the tint on the window make sure the window is practically saturated and dripping with the water/soap solution. Make sure you spray the corners. Try to center the sheet the best you can and use a large credit card to smooth out the tint. Start from the center and spread to the edges. You don't need to get all the bubbles out at this time. Trim the excess by starting in a corner with your credit card and a razor blade. Cut from the window; diagonally to separate the excess; then using the straight edge of the credit card or plastic card as a guide down the window, cut with your razor. Repeat on other three sides. The tint now is centered in the window. and the excess is removed. Spray soap/water solution onto the tint, it doesn't need to be saturated, just wet to help with any marring that may occur from trying to work our the bubbles. Sometimes you can use a squeegee, but I've had the best results seeing how the squeegee worked then using that technique with the plastic card that comes with the Gila Tint install kit and the cheap disposable razor. On each window new windows, snap the blade of the razor off to expose a new blade. Do your best to remove the bubbles, but don't obsess over it--as time and heat will remove most of them. A technique that worked for me with the plastic card was to keep the tint wet, and push the bubbles out in a back and forth S, left to right. If the moving out of the bubbles caused a bit of tint to spread, just trim it as described above. If some of the sides don't want to flatten, wait 12 hours and come back and try to smooth out the water from the sides of the tint. Do not wait 3 days to do this as the glue will dry and an air pocket will form behind the tint and on top of the glass. The water/soap solution is very to make... like just a drop of dish soap to a bottle of water. I've had the film on the windows for about 1 month and it is noticeably cooler in the house, easier to cool down when the AC is turned on. With patience and the right technique, this task will keep your home cooler in the hot summer months.
M**E
Difficult, but effective!
Firstly, I found the reviews on Amazon helpful before purchasing and using this product. I was able to install by myself...in fact, my friend came over to help, but I found this got in my way more than was helpful. DO take time to review the instructions and DO plan to have plenty of time for the installation because I found it requires smooth, well planned, unhurried movements to prevent creases in the material that is permanent. I followed the advice about using clothespins but subsituted the heavier bag-type clamps that you find everywhere to maintain chips freshness. I placed the material on the floor, put a clamp on each end of the material, exposed only six to twelve inches of the film in the beginning (instructions tell you how to do this), sprayed it liberally as instructed, and placed another clamp on each end of the film backing that I had just peeled away. This aided me greatly since I was doing this alone and kept the backing from reattaching to the film. I used the spray for auto tinted windows and applied liberally. I also discovered that it was much easier to handle if I folded down the scotch tape onto itself after I had separated the initial six to twelve inches; otherwise, the tape would invariably stick to me or to other parts of the film. That is how I creased my the first section I did. I did a double sliding glass door and 12 windows. BTW, if you have some bubbles after using the squeegy, don't panic; in a few days, it "cures" and the bubbles disappear. I am happy with the final resullts! My townhouse finally feels comfortably cool and my air doesn't run for hours during the day! I had installed a different product in l985 in another home from a company in Fla; unfortunately they were no longer in business. That product worked just as efficiently to block the heat, but was SO easy to install a 12-year-old could have been successful. It was also easily removed and reapplied. This isn't a superior product in my opinion, but seemed to be the only option available. Even though it is much more difficult to apply, it works to block the heat: the objective!
Trustpilot
1 month ago
2 months ago