Desertcart purchases this item on your behalf and handles shipping, customs, and support to Senegal.
🖤 Refresh your grout, refresh your space—because first impressions last forever.
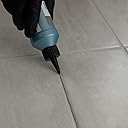
MAPEI UltraCare Grout Refresh is an 8 oz universal grout colorant and sealer designed to restore and protect grout surfaces. Its precision applicator tip enables easy, even application on both sanded and unsanded grout, while its durable formula seals against stains and moisture. Ideal for kitchens, bathrooms, and tiled areas, this product revitalizes grout color and extends its lifespan, making it a top choice for both DIY enthusiasts and professionals.
| ASIN | B006251T2A |
| Best Sellers Rank | #2,840 in Tools & Home Improvement ( See Top 100 in Tools & Home Improvement ) #11 in Tile Grout |
| Brand | Mapei |
| Brand Name | Mapei |
| Color | 5010 Black |
| Compatible Material | Stone |
| Customer Reviews | 4.1 out of 5 stars 588 Reviews |
| Item Dimensions | 6 x 2 x 2 inches |
| Item Form | Liquid |
| Item Weight | 8 ounces |
| Item dimensions L x W x H | 6 x 2 x 2 inches |
| Manufacturer | MAPEI |
| Material | Epoxy , Urethane , Polyblend |
| Material Type | Epoxy,Urethane,Polyblend |
| Model | 38410 |
| Number of Items | 1 |
| Part Number | 5LA501052 |
| Style | 5010 Black |
| Style Name | 5010 Black |
| Surface Recommendation | Tile |
| UPC | 093994510525 |
| Unit Count | 8 Fluid Ounces |
| Water Resistance Level | Water Resistant |
C**W
READ ABOUT MY EXPERIENCE
I was VERY skeptical of this product from reading reviews, but it worked GREAT for me--but read how and why... I read where people used a paint brush, and I thought that was rubbish and more tedious to even contemplate. Um...they were right--do it that way. I did my entire kitchen floor NOT using a teeny tiny brush and the clean up was hell. But, later, when I did my mudroom, I actually taped it off ( yes, used masking tape) some lines. I did not tape off each square, just vertical lines. I wasn't looking to mask it perfectly, just enough to cut down the cleaning process afterward. WOW...what a difference. Sure, once I took the tape off I had areas that were overlapped with tape and obviously missed, but nothing that was too crazy. And I used a small brush. I would not--NOT NOT, try to change the color too far from what the grout was originally. I had black grout, and bought the black--it is more of a dark gray but it was totally fine. I doubt you would have much success going from dark to light. My grout was chalky and discolored from sediment and cleaning build-up...none of which I was ever able to remove. This product made it look like the day the floor was first grouted. Make sure you have a small STIFF brush--like an artists brush from a craft store. Have a pail of water and some paper towels to catch any big spills as you go. SHAKE the bottle before starting. I read where someone said the bottle was hard to squeeze?? I just used utility scissors and made the spout of the bottle slightly bigger. I also poured some into a small disposable bowl. When I painted it on, I let it dry for more than an hour, peeled off the tape and then took my time to just clean the overage off of the tile, Don't wet it all down like you do with fresh grout. I am exhausted, it took 8 hours to do my kitchen ( average) and my mudroom. I do not plan on washing my floor for a few days so this has a chance to cure. Good Luck!
J**E
A miracle for awful grout!
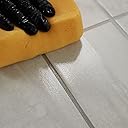
I used this for a shower stall covered in mosaic glass tiles and for the floor with bigger tiles. My shower looks brand new! If you have small glass tiles here is the method I used to prep and apply this product: 1. Steam clean the grout or use vinegar and water. It doesn't have to be a meticulous cleaning, just getting oily stuff off. DO NOT USE COMET or anything like that because as you'll see from other posts this product won't stick. 2. For the millions of lines in mosaic tile don't use a q-tip or even a bevel -cut black craft sponge unless you have very strong sedatives or the like easily available for the crushing monotony that would ensue. Instead, get one of those big yellow tiling sponges and cut it into sixths. 3. You can apply product onto sponge or tile then rub it in. Do a 2'x2' patch--apply more to resistant places. Move onto the next patch, rub stuff onto tiles. 4. Go back to first patch and buff off residue from tiles--a light skimming over the top with a wipe is super effective. Repeat. For floor grout squirt the product on the floor grout then use a tooth brush to work it into grout.--Again, unless you have a glue sniffing addiction and/or enjoy slow moving tedium, don't use q-tips--a toothbrush works super well. Use wipes or a wet rag to wipe residue off tile after 20 or so minutes. Massively important: let this stuff dry. I mean really dry--it seems to harden over time.
D**D
Amazing and easy
I have a 1929 house and have tried everything to get the bathroom grout cleaned and nothing worked! I saw a video of someone using this and thought “probably won’t work but wth” I got it and when I say I was shocked at the results, I mean it! Application was easy, I put the paint in a bowl and used a small brush to paint the grout. I then let it dry overnight, the reason why is the suggested 25 min dry and wiping off method was a mess. Once dried I used an exacta knife and just followed the lines to get any off the tiles and swept up the debris, easy! There is no odor and one bottle did the entire bathroom, a little goes a long way. I highly recommend this product for refreshed grout.
S**S
Used Black Grout Refresh
I used the black Grout Refresh, and it was more time consuming that I anticipated. Hubby and I started at 9 AM and finished at 5 PM. The one thing I noticed upon finishing was that my grout lines were a bit uneven a few places such as near the installed wood floor which goes into my bedroom - not noticeable with the beige grout. (Obviously not a Refresh problem). I have had the Refresh on for only a week so I'm not sure about durability, but it looks okay. I have used a plastic knife a few times in the past week to remove a bit of grout on the tile itself that I missed last Monday. If you look closely (eyes close to floor), you can (maybe) tell it's not the real grout color. I am a perfectionist so I am extra critical. Would I do it again? Perhaps after I first exhausted several methods of grout cleaner to bring back the original look to my kitchen floor. I put the Refresh on with a kid's toothbrush and touched up later with a Q-Tip. I learned that we had to leave it on longer than the 35 minutes to an hour. And the directions say to mist it with water after that time period. No, that didn't work for us. The color came off. So we left it on for about 90 minutes and then wiped it off with a rag, used a kitchen scratcher on my rough tile, and finally a bucket of clean water and thick sponge. The learning process....
G**E
Heed my call, warriors of the weekend.
For the love of all that is good test a tile first. This product might work ok, but the instructions are what nightmares are made of. The bottle has like two sentences, both which are cryptic. Online videos actually differ from the printed. I did my best to follow instructions, and applied my first time with a heavy bead thinking it was a dye and would wipe off the tile and soak in the grout. First fail- after further research realized it was a stain/sealant. VERY BIG DIFFERENCE, because sealant stays unlike stain. Due to online tutorials on Pinterest and YouTube I wasn’t worried that it would stick to the tile, thought I could wipe off easily. Nope. So I spent HOURS scraping each and every grout line in my bathroom to get it off because it JUST WOULD NOT STICK TO THR GROUT. Then I had awkward remnants making my tile way worse. Due to the positive reviews I knew it had to be user error-but i tired literally to a “t” every set of instructions I could find. The stuff wouldn’t stick. Wet method, dry, nope. Overnight, one hour, 30 min, 5 min soak. Nope. Reviews were so polarizing and I realized about 15% of them had the same problem. Well I did a lot of research and finally went to a tile store and found out SOME GROUTS REQUIRE YOU TO STRIP THE SEALANT ALREADY ON IT. Literally not mentioned anywhere. Once you strip the existing sealant it finally sticks and works as it should. If someone had just mentioned that in the product material anywhere I could have saved so many hours of scrapping and wondering what I’m doing with my life, because no sober person should spend that long hugging a toilet. If I could give less than one I would-that’s how much of my life was wasted by this product. Highly recommend the tile store in Cary, Nc. They sell sealant and grout sealant stripper.
M**L
Dark gray NOT BLACK
The only way this could be considered black is if you're in a dark room. As some other reviews have mentioned, the final color is not black but a dark gray. You see that color swatch picture provided on the page? That's really the color. "But it's labeled 'black' and I know what black is," you say. Well, forget everything you know about black. Mapei certainly has. It's about the same color as Mapei's "black" grout. If you buy a black caulk to go with this, they won't match (ColorFast's caulk is really black and Mapei's caulk is slightly black but lighter than ColorFast's). If you're looking for a real, onyx, jet, midnight, void-of-space black, this isn't it. I applied this in a small area with a Q-tip. It went on with zero problems and cleaning the subway tile it got on was a piece of cake.
K**B
Kinda blown away!
My first solo DIY project at my new condo. This stuff was so easy to use! It did exactly what I expected, hoped & made my vision come true! I watched ppl on youtube & read reviews. Not even sure that’s needed. Honestly, if you have recessed rough grout - the “wet method” works as shown here (just as the inside label directs). I applied with an old toothbrush & my finger (second application more). What worked better for me - (I never sprayed the solution with water afterwards & no paper towels were used!) - I used ONE microfiber cloth (same one the whole time) with warm water after I left it sit for 20+ mins. It was a breeze to wipe off. I used warm / hot water in a bucket & continued to ring the cloth out while cleaning up the tiles. Warm water + microfiber cloth for the win! So simple & easy. Also, I didn’t wear gloves it seemed best to really feel and manage what I was doing. It cleans off hands easy with warm water & I wasn’t worried about chemical obviously. Finished & it looks like it always looked this way! Super pleased. I’m going to use grout sealer next to protect the stain & keep it looking fresh.
A**N
Warning! Do not try to make floor grout lighter!
I have seen people use this to make dark grout lighter and this is a terrible idea unless you are doing an area that will never get dirty (in other words, not on a floor). If you try to lighten a dark grouted floor you are just begging for more dirt and more cleaning every few months. But if you want to go darker, that is great and if you go dark enough (we went black) it will make your cleaning jobs less frequent and easier. Yes, this also seals (it is basically just paint) but no grout sealer made prevents dirt accumulation and none make cleaning easier. I have done the tests to prove that. Sealers are basically worthless. The best way is always a color dark enough to hide the dirt that is unavoidable. If you don't believe this, go ahead and waste your time and money with a light color and in a few months you will find this out for yourself.
Trustpilot
2 weeks ago
1 month ago