Buy anything from 5,000+ international stores. One checkout price. No surprise fees. Join 2M+ shoppers on Desertcart.
Desertcart purchases this item on your behalf and handles shipping, customs, and support to Senegal.
🛠️ Trim Like a Pro, Finish Like a Boss!
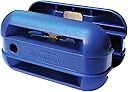
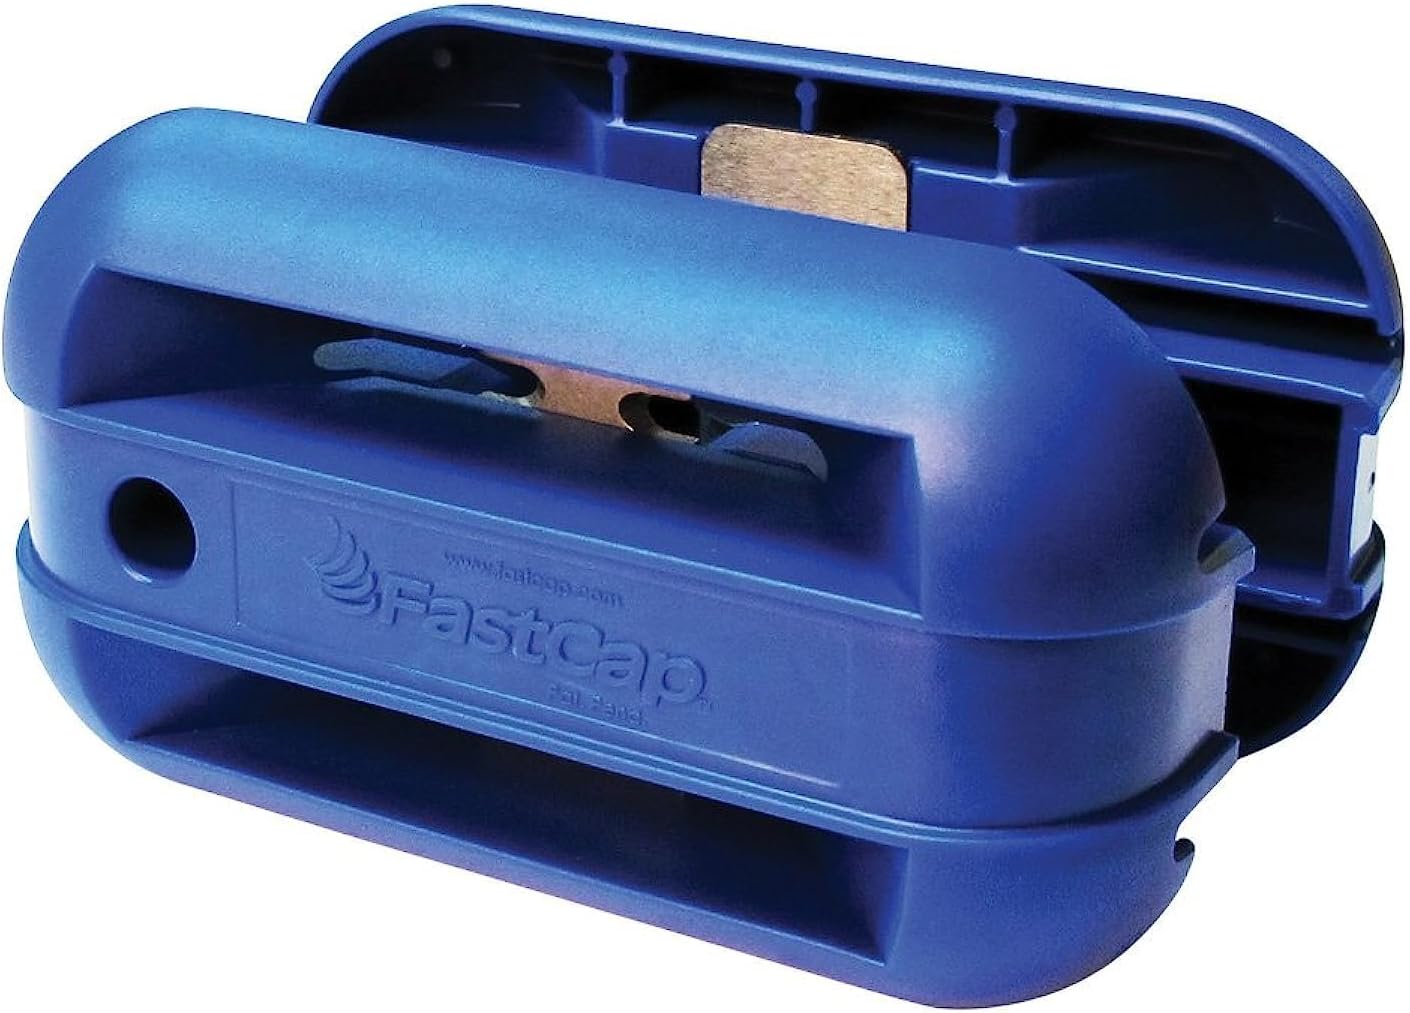
The FastCap Q.Trim Pneumatic Quad Trimmer features a 30-degree carbon steel blade engineered for precise, clean edge banding. Its unique pneumatic, no-spring design allows effortless trimming in all directions with ergonomic comfort. Lightweight and durable, this tool is backed by a lifetime warranty, making it an essential for professionals seeking flawless finishes on cabinetry and furniture projects.


| ASIN | B000WULWX2 |
| Best Sellers Rank | #196,784 in Tools & Home Improvement ( See Top 100 in Tools & Home Improvement ) #242 in Knife Blades |
| Blade Length | 1 Inches |
| Blade Material | Carbon Steel |
| Brand | FastCap |
| Brand Name | FastCap |
| Color | Blue |
| Customer Reviews | 4.2 out of 5 stars 1,884 Reviews |
| Cutting Angle | 30 Degrees |
| Global Trade Identification Number | 00663807800770 |
| Included Components | trimmer |
| Item Type Name | trimmer |
| Item Weight | 3.84 ounces |
| Manufacturer | Fastcap |
| Manufacturer Part Number | Q.TRIM |
| Manufacturer Warranty Description | Lifetime |
| Model Number | Q.TRIM |
| Other Special Features of the Product | Super Smooth Action |
| Power Source | Pneumatic |
| Special Feature | Super Smooth Action |
| Surface Recommendation | Wood |
| UPC | 663807800770 732454056059 370839595443 778417425821 |
| Unit Count | 1.0 Count |
| Warranty Type | Lifetime |
T**R
A necessity for edge banding
Purchased this for a bookshelf project. The cabinet and shelves are furniture-grade cherry plywood. I wanted a clean, professional finish to the 7/8" cherry edge banding. I applied the edge-banding veneer. It came pre-glued and was applied using an iron. After it cooled I rough-trimmed the edges using a box cutter. The final trim was done with the FastCap Trimmer. It only took a single pass in each direction. The results were impressive. The edges were clean and consistent. The tool is amazingly easy to use and provides great results.
D**5
Works well
It makes short work of trimming the veneer edges on my 3/4in panels. It does a decent job. But there is a fine line between firmly gripping the work surface enough to keep the blades in contact with the work surface and squeezing too hard making it difficult to slide the trimmer along the work surface. But I really think that holds true for most any type of these trimmers. Other than that there really isn't anything special to say. The item is a lot bigger than I thought from the picture. It is difficult to trim items that are already assembled, such as things built at opposing angles. So do your laminate work and trimming before assembly or you won't be able to trim the edges. I know that seems logical but I couldn't wait and did some assembly work before my trimmer arrived. Duh... wooops! Over all it is a decent trimmer that does a decent job.
G**Y
Works great on T-Molding
I built a Lightning McQueen Twin Bed for my grandson's 3rd birthday. I needed to add T-Molding along the edges and needed to trim about 1/8" off each side. I read online that this was the tool to use for the job (after trying to use new razor knife as a test... didn't work too well). I saw a youtube video that gave a great tip: For doing T-Molding (especially if you're going to have any radius in the final install) lay out the T-Molding on a stretch of straight edge and trim it there first (moving the t-molding along the straight edge in sections and trimming each section as you go) to get the whole roll of t-molding trimmed before installing on the final project. Made it soooooo much easier. Tips I learned the hard way: 1 - Practice a bit first to get the feel for it. At first, I struggled with the tool to get a good cut. After practicing a little first, I was able to get super clean cuts really quickly. 2 - Follow the tip listed above from the youtube video especially if your project has any radius. 3 - Occasionally stop to disassemble and clean the blades. Helped me tremendously. Overall, I only needed to trim 36 feed of T-Molding but the tool was still working 100% by the time I was done. I'll keep it on hand for the times I need to change / install T-Molding on my arcade machines.
T**E
Good, but CHECK THE BLADE ORIENTATION before using! (Updated 1/17/18)
This trimmer is pretty good. I'm using it on oak edge banding, and the grain direction is a bit of a problem. It probably works better on plastic edging. Anyway, when I received the trimmer, I tested it immediately, but all it would do was smash the edge banding against the surface the edging was attached to. I examined the trimmer and then realized that whoever assembled the thing attached the blades the opposite way they should be. So I unscrewed them and flipped them around so that they would cut flush with the edge of the surface. It was a little frustrating because Fastcap should have better quality control, but I'd say I'm satisfied with the purchase. UPDATE (1/17/18): Reduced from 3 stars to 1 star. The project that I bought this tool for is the only one I ever ended up using it on. I found that using a fresh razor blade is the very best way to get a nice edge on banding. When it gets dirty from the glue, just throw it away and use another. So much cheaper and easier than this gimmick of a tool. Absolutely not worth even $5.
J**S
good edge band trimmer
I'm pleased with this device- I got it to do one thing- trim off excess edge banding off plywood. I dont know if it can be used to do anything else, assuming it's just for what I use it for. It's performed well and I have no complaints with it. It cuts edge banding accurately, cleanly, and is a major upgrade (for me) because I previously was cutting off the excess banding with a razor blade. I'm new to wood working, so obviously didnt do a great job trimming the excess. Im sure there are folks out there who think this is totally unnecessary, and my goal is to get to the point where I also wont need this device to trim edge banding cleanly, but until then, this works quickly, well, and reliably. recommend for others who aren't skilled woodworkers. That, or, dont use plywood- stick to wood, and you'll never need to use edge banding.
A**M
I made the correct choice!!! Buy this one!
Out if all the options this isn't the cheapest nor the most expensive. But for me it was the correct choice. It works flawlessly! Although I added a few steps to help it. 1. I used a round scrap metal piece to press the banding down while it was still warm so that it would force the glue into the plywood edge. 2. I installed the banding 1 side justified. Meaning it hugs one edge so that the left over side over hangs. That way I'm only trimming one side with this tool! No break or chipping happened. This WILL NOT navigate around corners, or rounded areas. It will also NOT cut flush to the edge of your work area. I used a razor knife to finish those areas. See photos. I'm very pleased with this tool and recommend it with use of commonsense!
J**N
Fastcap Edge Banding Trimmer
With a single-edge trimmer, direction of cut can be varied so that you are always cutting with the grain. With a double-edge trimmer, like this one, unless you are trimming man-made materials with no grain, no matter which direction you cut, you will be cutting with the grain on one side of the banding and against the grain on the other side. Sure you can pull the trimmer apart and use one side at a time as a single-edge trimmer, but there's a better way. When you cut, the bevel of the blade (like the chip-breaker on a plane) tries to push the shaving away from the surface at a fairly radical angle. One of two things will happen. The grain can break at or shortly in front of the edge of the blade, the shaving will curl, and you'll get a clean cut. Or the grain will resist breaking, causing cracking well ahead of the blade edge, and you get a ragged cut and tear-out. Grain resistance is related to both grain direction (if it is sloping out, there is little resistance) and thickness (or in the case of a trimmer like this, width) of the cut: fine cuts minimize tear-out. I pulled the trimmer apart and on the 'bottom' of each side, I stuck pieces of UHMW tape (about 1/64" thick) on the little bits of plastic to each side of the horns of the blade that normally bear on the front and back faces of the stock you are banding. I left the 'top' of each side (on the other side of the posts) as it was. After re-assembling the trimmer, I make two cuts to trim the banding. The first is with the trimmer right side up, with the added tape bearing on the stock. This holds the blades a bit away from the faces of the stock, hogging off most of the material, leaving the banding with 1/64" overhang on each side. There is tear-our on the downhill grain side, but this tear-out is confined to the overhang. For the second cut, I turn the trimmer over, so that the blades are now snug to the faces of the stock. The remaining overhang is narrow enough that the grain easily fractures, the shaving curls tightly, and the resulting edge is quite clean. If any additional clean-up is needed, I'll take a pass or two with a finely adjusted block plane. As always, the blades benefit from honing. I flattened and polished the backs of the blades on a succession of waterstones and honed the bevels with sandpaper wrapped around a bamboo skewer. Carbide blades are much more difficult to sharpen and typically come from the manufacturer less sharp than carbon steel blades. If you are trimming abrasive materials, carbide blades will hold up much longer, but they will produce a poorer quality edge.
S**.
Easy to grip, cuts both sides, leaves clean edges!
This Quad trimmer was recommended in a Utube video. It does the job well, but can be hard to squeeze together. I used it on Melamine tape that had been ironed onto the sides of a Melamine desktop. It is easier to use than a carpenter's knife or straight edge knife. It trims 2 sides at once and can be used against the grain. After usage I sanded the sides of the strip with a 220 grit block just to make sure the edges were smooth. My shelves and desktop all turned out well. I would recommend this tool to anyone who needed it for iron on banding, either wood or melamine.
H**Z
Doesn’t trim close enough
Trims thick banding but the edges are not cut close and I need to use a blade afterwards which negates the reason I bought it.
A**S
Works great
Works just great with clean sharp edges . I only tried it on melamine
B**L
Simple to use tool. Good Results!
I ordered this not expecting it to be great, but was surprised. It's a good quality plastic tool, perfect for the DIYer. I did 5 arborite counter edges and it held up well. This is intended for light wood or arborite counter edges typically put on with contact cement, not the heavy iron on preglued edging. Make sure to do a substantial first run then over it lightly a couple more times. A little minor filing and voila!
M**O
Excelente herramienta
Muy útil herramienta, muy eficiente, practica , fácil de usar , diseño práctico, ergonómico, eficaz , materiales muy resistentes, corte muy profesional y limpio, duraderos, la recomiendo ampliamente,
ا**ي
مزيد من الصور
المنتج جيد
Trustpilot
1 month ago
1 month ago