


Buy anything from 5,000+ international stores. One checkout price. No surprise fees. Join 2M+ shoppers on Desertcart.
Desertcart purchases this item on your behalf and handles shipping, customs, and support to Senegal.
๐ Upgrade your iPhone 11 PRO power gameโnever settle for less!
This 18800mAh high-capacity replacement battery for iPhone 11 PRO offers triple the original battery life with zero-cycle freshness and over 2000 recharge cycles. Certified for safety with advanced protection chips, it comes with a full professional tool kit and 24-month warranty, empowering you to effortlessly extend your phoneโs lifespan and reduce charging frequency.
| ASIN | B0GJRQHCQC |
| Antenna Location | Phone |
| Best Sellers Rank | #1,710 in Cell Phones & Accessories ( See Top 100 in Cell Phones & Accessories ) #1 in Cell Phone Replacement Batteries |
| Brand | Luuzkla |
| Compatible Phone Models | 11 |
| Customer Reviews | 4.4 out of 5 stars 853 Reviews |
| Manufacturer | Luuzkla |
| Model Name | 11 |
| Model Number | 11 |
| Recommended Uses For Product | Phone |
| Reusability | Rechargeable |
| UPC | 769230078578 |
| Unit Count | 1.0 Count |
| Warranty Description | 2 |
A**R
Just what I needed
My PS4 controllers were no longer holding a charge so I got these. There weren't any instructions but with a quick YouTube search I was able to find a video showing the entire process. It's a pretty straightforward process, the hardest part (at least for me) being getting the back of the controller separated from the rest. This kit does come with a plastic pry bar for this purpose. Each battery has 2 different plugs. In my case, I had one controller that came with my console & another I bought at the same time. Interestingly enough, one required the smaller plug & the other required the larger one, so it was good that these accommodate both. Also, both batteries arrived fully charged and ready to use. I'd definitely recommend these as they were very easy to replace and cheaper than buying new controllers.
K**S
Long battery life and long time to charge, but it works!
For the momemt I'm giving the Luuzkla battery 5 stars. It included the tools needed to upgrade the PS5 controller, as well as instructions. I still recommend watching some videos online. The last *pop* of the 2 halves of the cover took a lot of force to unclip. - Battery took a loong time to charge, but it also is lasting a lot longer. I would say about 80% longer than the OEM battery. 8-10 hrs now vs 5-6 hrs. Keep in mind, this replaced a 3 month old controller battery which was supposed to be the newer bigger better Sony design. I have to admit, the older OEM controller that came with the PS5pro a year ago, has better battery life than the newer chroma teal controller, which was surprising. I will eventually replace the OEM battery as well, but it's still getting close to 7+ hrs on a charge, so no hurry there. I wanted to wait on the review until I had charged it a couple of times. (I have bought batteries in the past that worked great on the first charge and then totally died on the second charge.) No problems with this battery so far. I will definitely update this review if anything changes. I would recommend and buy again.
L**D
Bring a 1UP to your PS4 controllers
These batteries are great! Bought and installed them in my PS4 controllers that were not holding a charge anymore and always needed to be wired to play with. They are nice and last a long time between charges. I can play ESO all day and not need to charge or swap controllers.
G**C
DIFFICULT BATTERY REPLACEMENT FOR ME, BUT BATTERY SEEMS VERY STRONG
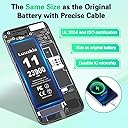
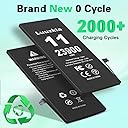
9/25/25- Luuzkla 19800mAh (2025 New Upgrade) Battery Compatible with iPhone 12 This was the very 1st battery replacement for this phone. After install, I do not see a battery warning of any kind unless I go to BATTERY in Settings and look in Battery Health. It says it cannot determine the Battery Health. *The screen removal suction cup that comes with this kit is WAY too weak to remove a well-sealed iPhone screen. I ended up using my dash Cam suction cup, which worked much better. *This kit does not come with a stand-off screw remover, so you will not be able to remove the Haptic Engine and Sim Card Holder (which seems to be unnecessary anyway). * It is HIGHLY doubtful that this battery is actually 19800mAh. I haven't measured it, but it's probably closer to 4000mAh (which is a total guess). I just put the battery in, so I will report back as soon as I have any info. So far, it's MUCH better than the failing OEM battery and took about 6 hours to charge via cable, (not wireless) from completely dead. *Battery comes half charged. *ADVICE... After install, run battery all the way down until your iPhone shuts off and leave on charger 1-2 hours AFTER fully charged. Do this a few times to set the battery memory and to see if your phone and battery BMS are working correctly. English instructions poorly worded and hard to understand, and it basically tells you to watch a YT video for instructions. I've replaced older iPhone batteries before, and I must say, this was by far the toughest one to do even after watching several videos. At one point, I almost wrote off my phone as I just couldn't get most of the connectors to pop back on, especially the battery connector. I never had this type of issue before this repair. I also followed a written addendum they included that tells you how to place and reconnect the battery, but it still took countless tries. Finally got it all together and powered up to a completely grey screen, which scared the bejesus out of me. Re-tried a power up once more and it worked. YAY! The kit comes with the 19800mAh battery, 3 different screw drivers (which should be color coded), a pick, an angled-pair of electrical tweezer, a plastic pry bar (Spuger), a suction cup (that's too weak to pull the screen off), adhesive strips to hold down the battery and a replacement screen gasket. NOW I GOTTA DO MY WIFE'S IPHONE 12... UGH!!! 10/4/25 UPDATE- Still working great. Charge seems to last a bit better after a few days of training the battery (charge to 100% and use all the way til the iPhone shuts off by itself). Was worth the money, but again... install was not easy.
O**N
So far so good!
Has everything you need to get your phone working again. The battery health is back to 100% on my old iPhone 6sPlus. The instructionsโฆDont even try to read them lol. Plenty videos on YouTube for a very concise repair. I used all the tools except for the smallest screw driver and the adhesive that goes along the border(i left that out in case i have to open it again) Be mindful of what you plug your phone into whether it be an outlet with USB or a crappy gas station car charger, as some of those exceed the charging voltage and can shorten the life of batteries or make them overheat. This replacement has a limit of 4.35V and the outlet on my nightstand charges at 5.1V๐ฌdoesnt sound like much, but repeated cycles will def reduce longevity and battery stability. Use your original power cube or a reputable brand and cable. (my iPhone 14 from 2022 is at 80% even with โoptimize charging schedulesโ or whatever Apple calls it) This replacement is basically the same operating voltage as the Apple one 3.8V (new one being 3.82V). Time will tell if it holds a charge. Thank you Luuzkla! ๐ค
G**N
Works for me
Bought one of these when my iphone battery died. That one is 3years old now and still has 100% capacity. I bought another to have on hand .
R**K
Worked to help me keep my old phone alive as a spare, while I sent my new phone off for repairs
I used this to bring my old Pixel 3 back to life. The battery was bulging and I had given it up for dead several years ago. Luckily I kept it in a drawer. Anyway, my *new* phone's battery died and I had to mail it off to be repaired. So I ordered this battery kit, and installed the battery and sim card into my Pixel 3, and everything's good to go. I've only been using it for a week, so I am not sure if I'll eventually see the same loss of battery life that others have mentioned, but I did notice in the "instructions" (use youtube instead) it told me to completely drain the battery to ~8%, then charge to 100% on a SLOW charger (1amp). It said to do this EIGHT TIMES before using the phone normally. This theoretically conditions the battery and helps it live longer. Well, I didn't have time to do it 8 times, but I did my best to do it 3 times. Hopefully that's enough. I will say that the trickiest part is just taking the phone apart, but it isn't nearly as bad as I was afraid it was. The included screwdrivers were crap-- I happened to have a kit that included tiny screw drivers, so that was good. Aside from that, just watch youtube tutorials for swapping the battery and go nice and slow. I plan to keep my pixel 3 around for years to come as a "spare" for if my husband's phone or my phone need future repairs, and we need to just swap the sim card to the pixel 3. I know eventually the pixel 3 will be too old to do anything, but as long as it can get emails, texts, and place phone calls, I can still use it.
T**X
So far so good... but its still fairly new.
Battery seems ok on week 1 of install. After time, (2 or 3 weeks in) the readings are all over the place. Battery holding charge but at times it drops fairly quick and at times it holds.
M**R
Me sorpredio
Exelente rendimiento y precio
Trustpilot
1 day ago
4 days ago