

Desertcart purchases this item on your behalf and handles shipping, customs, and support to Senegal.
✨ Turn heads at every marina and campground with Poli Glow’s showroom shine!
The Poli Glow Boat & RV Restoration Fiberglass Kit is a professional-grade, easy-to-use system designed to restore, protect, and enhance fiberglass surfaces. Featuring a proprietary acrylic polymer formula with UV inhibitors, it penetrates deep to eliminate oxidation and provide a durable, high-gloss finish that lasts up to 6 years. This all-in-one kit includes cleaning prep, application tools, and protective gloves, making it ideal for boats, RVs, jet skis, and other fiberglass vehicles. Say goodbye to frequent waxing and hello to effortless, long-lasting shine and protection.
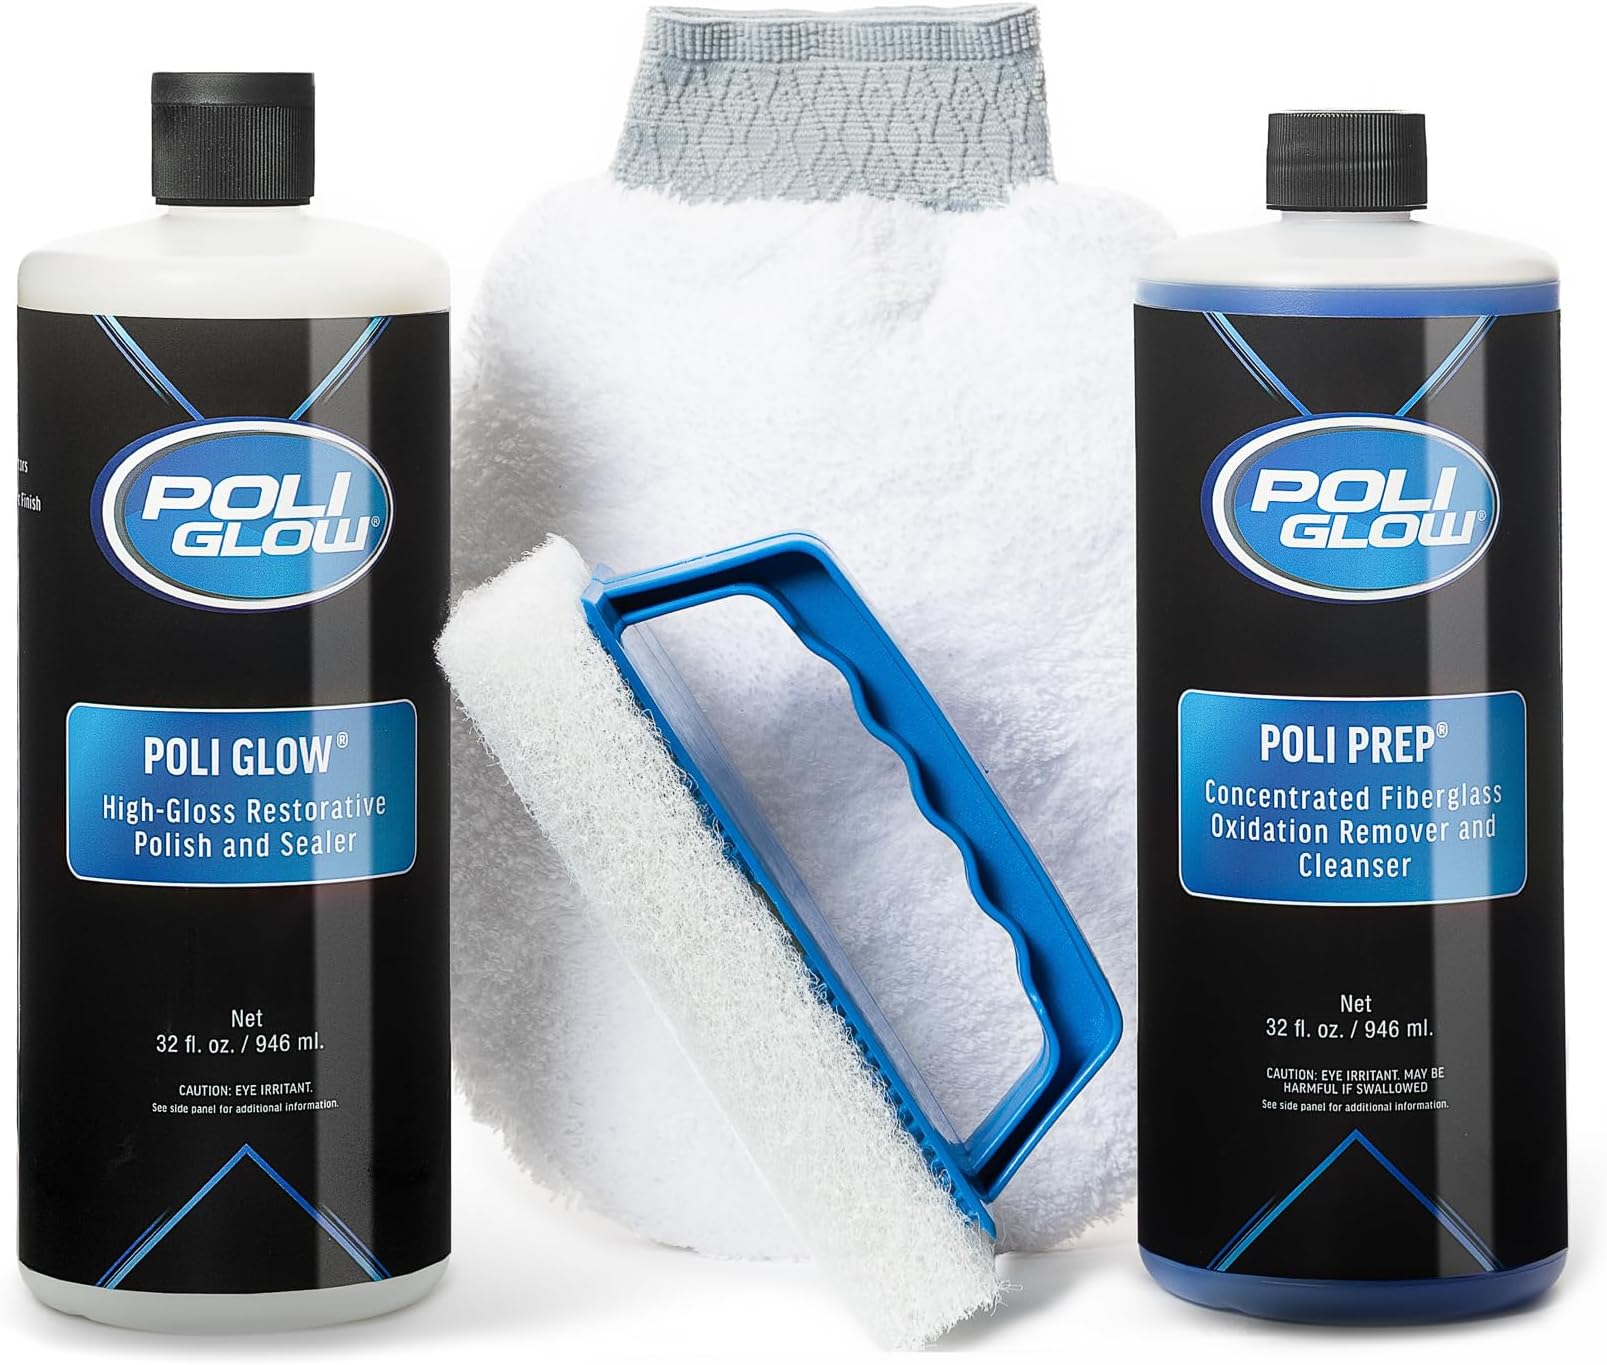


| ASIN | B00409S8AG |
| Best Sellers Rank | #30,433 in Sports & Outdoors ( See Top 100 in Sports & Outdoors ) #67 in Boat Cleaners |
| Brand | Poli Glow |
| Brand Name | Poli Glow |
| Compatible Material | Fiberglass, Painted Metals, Rubber |
| Customer Reviews | 4.4 out of 5 stars 935 Reviews |
| Grit Material | Abrasive |
| Grit Material Type | Abrasive |
| Grit Number | 2000 |
| Grit Type | Fine |
| Item Dimensions | 9.63 x 3.75 x 9.63 inches |
| Item Weight | 2 pounds |
| Item dimensions L x W x H | 9.63 x 3.75 x 9.63 inches |
| Manufacturer | Poli Glow Products, Inc. |
| Material | Aluminum, Fiberglass, Rubber |
| Material Type | Aluminum, Fiberglass, Rubber |
| Model | PG KIT |
| Part Number | PG KIT |
| Set Name | Kit |
| UPC | 757183267446 854899000050 782174207583 696735976088 |
| Unit Count | 1 Count |
A**R
Poli Glow Adventure
I may have to come back and change my review down the road after I have had time to see how it holds up. I bought this some time ago and tried it with poor results (my lack of williness to read and research) when it came out so streaky (more about that in a sec) I have a 5th wheel and it's a brown one seems like every video I look for to remove oxidation is the same brand and color as mine. My RV was badly oxidized and not because I didn't try to stop it. I waxed it several times a year with popular brands. I bought it used and it came with dark streaks at the window corners and some orange peal effect in areas. This spring I bought the poli glow and tried it on the back which was the worst area and was disappointed. I am a guy that is basically lazy! I want to take care of my stuff because if I don't it will get worse and be more work! So as soon as I started the process I thought that there has to be an easier way! I switched to the McQuire one step compound and got my buffer out and spent a week on my RV buffing and then waxing and I got it looking acceptable but not great no amount of buffing touched the peal look but the pisser was a few months later it had almost turned white again and the back end had what appeared to be fiberglass veins, man I was disappointed. I wanted to trade it off but not looking like it was. I am no expert especially at this type of stuff and this is not a how to! But I am a DIYer mostly out of nessessity because we live on the far side of nowhere in the suburbs of BFE! I tried to find an expert anywhere close but didn't have any luck. All my research typically lead me back to poli glow. I watched several videos on various things but decided to give it a go again but with the pads the poli OX it would help but I still had the orange peal and different shades of brown. I buffed, I bought various wheels of increasing coarseness and it progressively got better but.... And this is where it got sketchy I watched a video on a guy dealing with a badly oxidized boat and he sanded it and in the end it came out well. (Not using poli glow) So I decided I was going to try a corner but as soon as I hit it, it was like taking a big lock of hair off, you are just committed! My buddy who is car restorer came by and about fainted! In the end I bought sand pads and worked it by hand and slowly tried various grits until I got pretty coarse and crazy enough the orange peal came off not like it was gel coat but like some sort of build up! I tried to be very careful to watch how much I was sanding and avoided the decals as much as possible but I did go over them slightly to clear off any coating and essentially the sanding just replaced the poli ox process but surprisingly it seemed easier by hand than with the buffer and it didn't take a lot. I would wash it, let it dry and touch up until the color looked uniform and most of the peal was off. I was at the point that I was ok with the scratches left from sanding if the color came back. In retrospect a light hit with finer and finer paper would have been smart. I finally washed it and let it dry it was fairly uniform but clearly a dull brown then I put a coat of poli glow on. It looked terrible I could not put it on without streaks I decided to trust the process and I tried to follow the directions and go a different direction the second coat and I tried making an extendable applicator out my tool for aero wax to not have to climb a step ladder a million times but when it was all said and done the mitt is just the easiest especially with the windows and corners and I would try to wipe only one direction and focus on my hand, the flatness etc. and the area covered, it dries pretty fast and if you go over an area that you just applied that's partly dry but not dry it will roll up like a booger! It says 6 to 12 coats that made me want to cry but after about 3 or 4 the difference was amazing! Mine is a 35' 5th wheel and it would take about 30 minutes a coat. Now when I look at it, it looks new except where I got lazy or made mistakes. Doesn't fix my cracked decals but it shined them up. At this moment in time I am pleased for sure I just need to see how it holds up and what it looks like in 6 month and the refresh process. It's not applied like traditional wax but is easier to me once you get to that point. It's a process for sure and for me it was nothing but work. I spent a week because I would work at it for a few hours in the mornings and evenings (AZ) and stop because of the heat and sun. It could be done quicker especially if yours isn't as bad and the poli prep or ox does the prep job.
A**R
Great product, great support, looks better than new!
I couldn't possibly be more pleased with how my RV looks after Poli-Glow! I have a 2018 Rockwood 21' RV trailer that had not been treated before, so there was oxidation / fading from being in the Arizona sun - it just looked dull (the color is mostly beige). I am not usually a DIY'er. I researched options online and really appreciated the educational videos on Poli-Glow so I went with that. I don't have buffer machine or anything like that so I liked the idea of being able to do everything by hand. (Even if I had a buffing machine, I think that would have been more tiring having to climb a ladder with it and holding it over my head while applying a traditional wax - plus having to change between it and buffing cloths before wax would dry). Plus I like that this is a longer lasting treatment than a traditional wax. You will need some time - I spread my project over 4 days (day 1 - cleaning the RV and separate UV protection of the roof and awning; day 2 - Poli-Prep the whole RV; day 3 and day 4 Poli-Glow half the RV day 3 and finish day 4). Doing the Poli-Prep was easy. I mixed it in a spray bottle. I hosed down the section of the RV I was getting ready to scrub, sprayed on the Poli-Prep, scrubbed the area with the scrub brush that came with the kit, then hosed the area down and let it air dry. I only used about a third of the bottle of Poli-Prep. After the Poli-Prep the RV looked better than it did before, but that's not where the real shine comes from. I appled Poli-Glow to the RV surface, over the decals, plus all the black trim areas. The coats dried quickly so I didn't have any extra downtime between coats. When I finished a coat I walked about 30 feet to my working station in the shade, added more Poli-Glow to the mitt, and by the time I got back to the RV the previous coat was dry and ready for the next coat. Overall I worked a side of the RV from left to right; within a section I started on the bottom section up to almost as high as I could reach and used a ladder for the top half. The first coat get absorbed pretty thoroughly so the area looks only partially polished; by the 2nd - 3rd coat the shine really starts to show. Since I am in AZ, I applied the recommended 10 coats of Poli-Glow (10 coats to about a 5 to 6 foot section, then move the ladder to the next section). Overall I used 2 bottles of Poli-Glow with about a half inch left in the bottle. I did time my efforts both days to work on sections that weren't in the direct sun, making sure the area I would work on was cool or warm, not hot. Support was SUPER-FANTASTIC! I sent questions via Amazon contact seller and received very fast responses. They also sent me an email link to other videos from a detailer, so by the time I started I was confident and ready. During the project I sent pictures and they provided fast feedback that I was in fact progressing very well - very encouraging and confidence boosting. Thank you Sean! So yes, it took some time, but it was so worth it! It is shiny and beautiful and looks like new (actually better than new)! My neighbor has already asked me about it so he can do his RV. After I was done I took my victory lap - I sat in my driveway staring at it while sipping a beer, basking in the reflection of the sunset mirroring off the RV!
A**S
40 Years Young and Ready to Bring My RV Back to Life!
As a happy 40-year-old guy who takes a lot of pride in his RV, I’ve been on a mission to remove all the oxidation and restore that clean, glossy finish. After doing my homework, I decided to try Poli Glow Boat & RV Restoration, and I couldn’t be more excited about the results so far. I honestly can’t wait to see what it looks like once I’m completely finished. The quality of this product really stands out. It doesn’t feel like some quick temporary fix — it’s clearly made to properly restore fiberglass surfaces. The application use is straightforward, especially if you follow the prep steps carefully. Once I got into the rhythm of it, the process felt manageable and even kind of satisfying. What impressed me most was the smoothness it brought back to the surface. Areas that were dull and chalky from oxidation are starting to look deep and refreshed again. It’s doing a solid job with light scratch removal too, especially the small surface marks that naturally build up over time. I also appreciate the added layer of durability it promises. After putting in the work, I want something that’s going to last and protect the finish moving forward. And for anyone dealing with minor staining or corrosion spots, it definitely helps improve the overall look, contributing to better rust removal results around metal fixtures and trim. If you’re like me and want your RV looking proud and road-ready again, this feels like a serious step in the right direction. I’m genuinely excited to see the full transformation once I finish the entire exterior. Definitely worth the effort.
E**K
WOW WHAT A GREAT PRODUCT !!
My 01 Seafox was full and felt like sand paper all around, this kit brought it back to life ! Even after just the first step it was already improving, applying the glo was straight forward. I did 7 coats and the boat looks like glass now ! It was easier for me to hold the pad they provided rather than putting my hand in it, was a lot easier to get full strokes evenly. Also I have so much left over and again did 7 heavy coats ! I can’t wait to do the inside !
P**B
Overall great product, especially on solid colours.
I bought a 33 year old boat that is mostly white gelcoat. Some of the white had yellowed in areas and there were bright spots where I removed stickers and hull numbers. The boat also has red and blue metal flake that was quite faded and gritty. The flake is large particles of metal or paint or whatever, not fine little glitter bits like they do now. I called Poli Glow Canada and the guy told me to use 600 grit wet sandpaper to smooth out the metal flake and then wash with the Poli Prep. The white came up pretty clean, but I had to use the sandpaper on some areas to take off the yellow. The Poli Glow went on really easily and quickly. When you are doing it, keep an eye on the the edges of the applicator. If the liquid starts to harden, wash the edges in warm water to get them soft again. I didn't do this and have some small bumps kind of like fuzz off a paint roller, which I guess is bits of dried liquid that came off the applicator. You will also get streaks if the edges are dry, but the next coat fixes that right away. Check after each coat to ensure it is smooth. I'm pretty sure a quick pass with the sandpaper would have removed the bumps, but by the time I was finished, I didn't want to mess with it. In the end, the white turned out looking great. The flake is definitely better than when I bought it, but it only shines at about 50% of original (compared to the flake on the transom which was in really good condition) and I was expecting better based on the before and after shots on their site. There are also some streaks in the flake from certain angles where I guess my sanding pressure wasn't consistent.
T**.
I am hard to please...especially expensive products...
K...So I have this 26 ft. sailboat. I have all the professional equipment you can use to restore fiberglass shine. However, a 15 year old sailboat's topside will usually have pitting that you COULD sand down and shine.. but this is a risky step as you think the gelcoat and if you go through, now you have an eyesore of an entirely different nature... My only problem with trying this was the idea that it would fade out shortly and possibly yellow. However, a bigger concern is continued breakdown of the glass surface. An over-riding concern. Wax on a surface that is pitted is usually short lasting and does shine well..good for 3 months, maybe. I bit the bullet and bought this after looking at it's competitors. BUY THE KIT, NOT JUST THE POLIGLOW. The cleaner worked better than any other I have bought. I don't know why. It just did. The scrubbing sponge is perfect for the job. I used a smaller dishwashing scrubber in tight spaces..it seriously was inadequate. This kit was made right, I'm thinking. Following the directions to apply per the bottle. I was skeptical about using a damp mit. I have done the entire cockpit area of the boat at this point with 6 coats and used maybe a half an inch of the product. And the boat looks absolutely AMAZING. Will this yellow? Will it last a year? IDK, but other reviews suggest positive experiences on both counts. Best of all, this will HALT the ongoing beating the topsides takes. (On another note, don't use this on nonskid. It's slick..just my opinion, maybe no more slick than new nonskid. But there is a really great product if you search "nonskid fiberglass surface restorer." Expensive but works.) Best description I can give you on how this will turn out is .. you know how good a surface that is aged looks when you wet it? That..but it stays. Yes, you will need 4-6 coats. But it dries very quickly and still doesn't use much product. At this performance level, the price was worth it. And I am frugal beyond belief. I would recommend that you do professionally buff any fiberglass surface with a good medium one step cutting compound and a professional buffer before you apply this to get best results. DO NOT USE THIS ON SURFACES THAT ALREADY ARE SHINY. It says so right on the kit. I also agree your smoothest outcome will come at room temp vs applying int the sun or significant heat. It dries quickly and doesn't even out as well before drying. Still, it will look great.
S**3
Far better than I imagined...
My neighbour 'discovered' this 2 years ago and spent last season in florida applying it to his 2004 5th wheel. I had my doubts that it would bring back the badly oxidized nose and end caps, or whether it would turn yellow from the summer sun. He arrived from Tennessee this past fall and to my surprise the caps were still shiny and the graphics bright. I helped him finish the rest of the camper which transformed his 'old' trailer into a show boat. I ordered my kit and and using a prewash of mothers auto wash, cleaned the rig (2010 39ft Grand Junction) I didn't need to use the Poli prep as it came up pretty clean with no deep stains. Using the hand mitt I lightly spread the Poli glow over the surface of the nose cap. The first couple of applications soaked into the skin and immediately showed a high gloss. It took about 6-7 very thin coats to provide an nice even blotch/run free finish. I discovered that less was better and using a very light touch and dragging the mitt across the surface, left the finish like a mirror. I did it in February with temps in the mid -eighties...each coat dried in less the 60 seconds and the whole process took about 2 hours... (I don't work that fast)... for the entire nose cap and hitch underbelly. It attracted all the neighbours (which is normal in an RV park), all of whom immediately ordered their own kits. Hell! I could have gone into business, right then and there, doing restoration on about a dozen units. The unit is sitting in S. Florida and when I get down there this coming November, I'll finish the rest of it. I'll update this review with results on how it survived the heat and sun. ps. one of the guys took a kit home to S. Carolina and shined up his 20 yr old, 17ft speed boat, the pictures he sent make it look better than showroom. He added that the painted graphics were badly faded, the poll-clean brought the paint back like new. nice.
C**H
N
Not the “ miracle” I was hoping for…the poly glo does go on easily. Not sure it’s worth the price.
M**O
Spettacolare
Meglio di ogni aspettativa
I**N
Great product for AUS with our harsh summers
Great product. Use on the front of our van and has completely revitalized it. Highly recommend.
C**E
Fa quel che promette... Da valutare la durata.
Ho comprato il prodotto per rinnovare la cellula in vetroresina del camper. Il risultato è notevole, si applica facilmente. Bisogna prestare attenzione a non fare bolle o colature durante l'applicazione. Visivamente il risultato è di una specie di verniciatura. È da capire quanto durerà nel tempo. Con un flacone di prodotto ho passato un camper da 6.20 Mt. avanzandone un po'. Sono rimasto deluso dal liquido di preparazione. Non pulisce come promette. La pulizia è stata effettuata con tanto olio di gomito con altri prodotti per la pulizia del camper.
D**O
Kit con applicatore generico
Arrivato nei tempi previsti, prodotto come da descrizione; é presente un applicatore ma non è quello originale con la pelle di daino che agevola l’applicazione. Ho dovuto sollecitare il venditore 3 volte per la risposta alla mia domanda circa l’applicatore e la risposta é stata un po’ generica. Tutto sommato buona esperienza; consigliato.
Trustpilot
3 days ago
3 weeks ago