🚀 Elevate Your Tech Game with Geekworm!
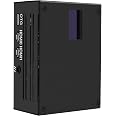
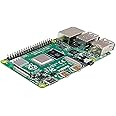
The Geekworm KVM-A3 Kit transforms your Raspberry Pi 4 into a powerful KVM solution, enabling remote control of your computer through a web browser. This kit includes a robust metal case, expansion boards, and essential accessories, ensuring seamless operation and compatibility with various Raspberry Pi models. With features like remote power management and advanced configuration options, it's perfect for tech enthusiasts looking to enhance their setup.
Brand | Geekworm |
Manufacturer | Geekworm |
Model | TB-2022-51 |
Model Name | KVM-A3 |
Product Dimensions | 9.2 x 6.5 x 4.2 cm; 319 g |
Item model number | TB-2022-51 |
Operating System | V3 HAT Platform |
Processor Brand | Raspberry Pi |
Hardware Interface | USB |
Compatible Devices | Personal Computer |
Mounting Hardware | 1 x Ethernet Cable(1m length), 1 x X630-A5 V1.0 Adapter Board with Accessories, 1 x KWM-A3 Metal Case with Accessories, 1 x X630-A3 V1.3 Expansion Board with Accessories, 1 x X630 HDMI to CSI-2 Module with Accessories, 1 x 0.96 inch OLED Module |
Number of items | 1 |
Batteries Included | No |
Batteries Required | No |
Wireless Type | 802.11b |
Connector Type | Ethernet, HDMI |
Manufacturer | Geekworm |
Item Weight | 319 g |
M**H
Great Kit - Works Flawlessly with PiKVM
I bought this as I needed remote KVM/IPMI access in an area that I can only get WiFi, and this kit plus PiKVM was a the perfect solution. This was my first foray into PiKVM so I can't it compare to other kits or PiKVM's own product, but this kit had a very easy setup and did everything I wanted. All you need is an RPI4B, this kit (with power supply), a microSD card, and an HDMI cable.Follow the instructions that come with the kit to assemble, then follow the instructions on the Geekworm website to image it with PiKVM, then go to the PiKVM website to finish configuring.If you expect to do some tweaking/experimentation and think you may need to re-image more than once, I suggest you don't close up the chassis. Although there's a slot to take the SD card out through the case it's too narrow to use, so better to leave the case open until you're 100% set up in case you need to remove the card, rather than removing all the screws every time.Once setup and imaged, all the features worked out of the box, including the OLED. It only takes a handful of commands in PiKVM to get it fully functional for immediate use, though there's plenty of tweaking you can do beyond the basics. If you need WiFi I suggest running wifi-menu (the built-in Arch linux wifi setup tool) instead of the instructions on the PiKVM website.You will likely get a repeating error message about low voltage when you first boot PiKVM with this kit attached. This is normal per the PiKVM website and should go away after a few hours of being powered on and building up a charge. It doesn't impact anything beyond being annoying and filling up your screen before you have full monitor resolution. CR1220 battery is not needed but should get rid of it as well.Great product, will probably buy several more in the future.
W**E
Should have bought one a long time ago
The package, once completed looks just like the photos. Very high quality build; very hiqh quality implementation. Very simple to "build"; simple to load up; simple to configure. Highly intuitive.In my case, I decided to try using the wireless with this device as I have a pretty good wireless setup. It does not disappoint in the least. I can hook it up to a computer literally anywhere within this house and connect to it; and I cannot tell the difference between wired and wireless, except for the convenience. The little screen works right the moment that it's configured. Took a few minutes to assemble . A few minutes more to load the image ( the V3-hdmi-rpi4-box-latest.img ). The display even gives you the assigned IP address once booted. Yes, you can load ISO images to the device as well. It's everything I want in a remote KVM; to hook up a computer that might otherwise be sitting in the corner.If I had to do it again, I might have bought a few of these instead of buying a kvm for physical boxes.The ONLY downside is that I'm used to multiple monitors; but hey, one can't be too picky. Ecstatic is how I would say I feel about the device.Only con I saw during the build was that a 10mm long screw was missing; out of two boxes; So mounted the hdmi input with just 3 screws; still quite solid.My only regret was not buying a few of these beforehand.
D**S
Positively outstanding
A few days into using this product, and I am wondering how I ever lived without it. I do a lot with headless PCs, at work and at home. This has already help me out of a tight spot with one of my machines (which I could not reach because of a network cabling issue). On headless systems, your network is your lifeline, and when anything goes wrong with that, you have zero visibility. By making a remote connection into the console on said PC, I was able to diagnose and correct the network issue from "inside."The box is very neatly packaged, the user interface is nice and clean, effective, responsive, and intuitive. There is some assembly required, but the parts are all well packaged, organized, and everything fit together without any hassle. I loved the first one so much I had to have a second one! One for the office, one for home.
S**N
Great - With issues
The other reviews that mention the EDID and the Audio issues were correct. However some are a bit out of date, as are the manufacturers instructions.It does now ship with audio support, and if you use the correct image when installing it's enabled by default in the software. I did need to connect the included 10 pin cable from the HDMI section to the HAT section before the audio would work. Thankfully the connectors are keyed so it will only fit one way. This is not mentioned anywhere in the included instructions, on the manufacturers website, or in the youtube instruction video that I could find. I figured it out from the clues left in another review here.You do still need to tinker with the EDID to get 1080p, and 1080p is as high as it goes. I also can't figure out how to get the color set to anything higher than 8 bit so most modern applications look pretty bad.The mouse cursor lags behind yours a bit, which takes some getting used to. It's basically old-timey VNC, so if you're used to RDP this will be a bit of a letdown. It does work though, and it's cheap for what it does.
A**Y
works perfectly
Good way to add kvm/ipmi/ilo/ remote keyboard video and mouse functionality to a computer. I'm using it with a server I put together using a workstation motherboard that didn't include remote management. Other than the cost of this thing, it works better than any integrated solution for remote kvm that I've used (and I've used a lot of dell/hp, and even some supermicro).It's a well built box. The little display is superflous but it works.The only real complaint I've got is that the RPI uses a little more power than I'd like for just a remote management device.
Trustpilot
1 week ago
3 weeks ago