Desertcart purchases this item on your behalf and handles shipping, customs, and support to Senegal.
๐ ๏ธ Restore, Protect, and Shine Like a ProโBecause Your Ride Deserves the Spotlight
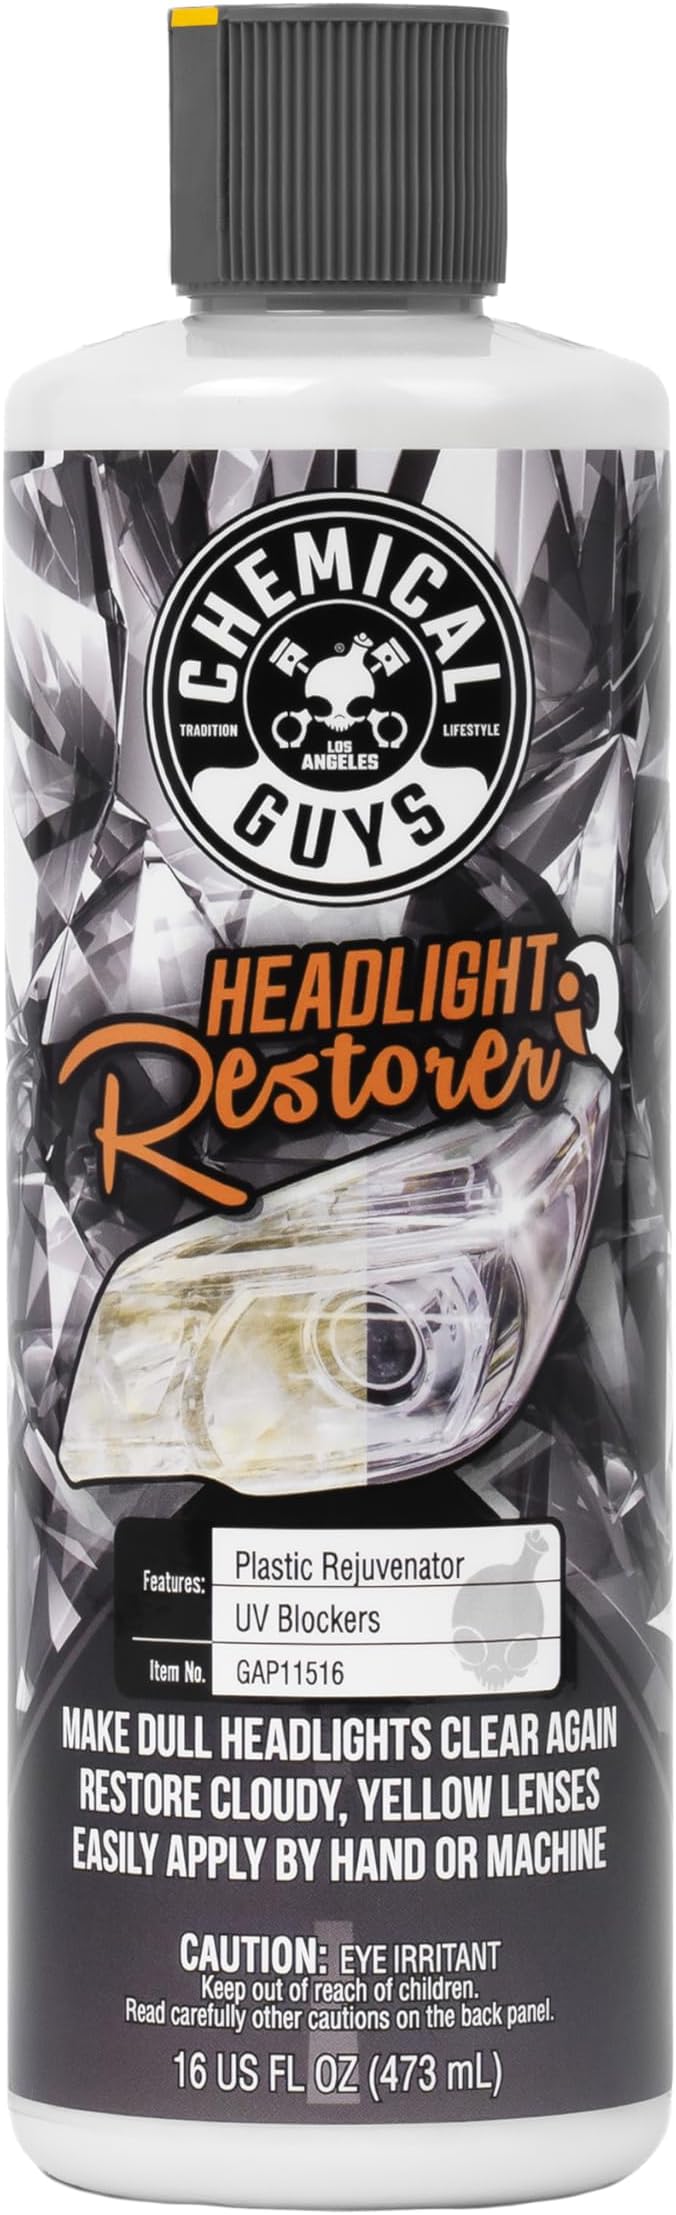
Chemical Guys Headlight Restore & Protect (16 oz) is a professional-grade, all-in-one formula that cleans, restores, and seals plastic vehicle lenses. It removes oxidation, yellowing, haze, and light scratches to deliver like-new clarity, while leaving a durable protective barrier that resists future damage. Safe for all clear plastic lenses including headlights, taillights, fog lights, and turn signals, itโs easy to apply by hand or machine, making it the ultimate DIY solution for enhanced nighttime safety and vehicle aesthetics.


| ASIN | B06ZYGJ4W8 |
| Allergen Information | Allergen-Free |
| Best Sellers Rank | #650 in Automotive ( See Top 100 in Automotive ) #3 in Automotive Headlight Parts & Accessories |
| Brand | Chemical Guys |
| Brand Name | Chemical Guys |
| Cleaning Agent Formulation | Degreaser |
| Customer Reviews | 4.4 out of 5 stars 9,785 Reviews |
| Global Trade Identification Number | 00811339028159, 30811339028150 |
| Included Components | Product |
| Item Form | Cream |
| Item Type Name | Headlight Restore And Protect |
| Item Volume | 16 fluid ounces |
| Item Weight | 0.5 g |
| Manufacturer | Chemical Guys |
| Material Feature | Clear Plastic |
| Material Features | Clear Plastic |
| Material Type Free | chemicals free |
| Model Number | GAP11516SW |
| Number of Items | 1 |
| Part Number | GAP11516SW |
| Scent | Unscented |
| Size | 16 Fl Oz (Pack of 1) |
| Special Features | Cleans and Restores Clarity |
| Specific Uses For Product | Headlight Restorer |
| Surface Recommendation | Headlights Tail Lights Turn Signals Clear Plastic Lenses |
| UPC | 811339028159 |
| Unit Count | 16 Fluid Ounces |
K**C
Worked much better than expected
This worked fantastic. My headlights now look brand new. The best they have ever looked. Very easy to use. Great product
K**B
This product truly lives up to its claims and has exceeded my expectations in every way.
I recently tried out Chemical Guys GAP11516 Headlight Restore and Protect, and I must say, I am thoroughly impressed with the results. This product truly lives up to its claims and has exceeded my expectations in every way. First and foremost, the professional-grade restoration provided by this headlight restorer is nothing short of remarkable. With just a simple application, the advanced formula effectively removes the faded, hazy appearance of my headlights, revealing the pristine plastic beneath. The difference in clarity is astonishing โ my headlights now shine with the brightness and clarity of brand new ones. What sets Chemical Guys Headlight Restore and Protect apart is its all-weather protection feature. It's not just a cleaner; it's also a protector. After restoring clarity, it seals the surface, safeguarding against harmful elements that cause yellowing and oxidation. This ensures that my headlights stay clear and vibrant for longer, even in harsh weather conditions. Perhaps the best part about this product is its cost-effectiveness. Instead of shelling out money for expensive replacements, a simple DIY with Headlight Restore and Protect rejuvenates and maintains my headlights, saving me both time and money in the long run. But the benefits don't stop there โ safety is also a top priority with this product. Improved visibility means safer driving, especially at night or in adverse weather conditions. Regular use of Chemical Guys Headlight Restore and Protect ensures that my headlights remain clear, enhancing my night vision and overall road safety. And let's not forget the ease of use โ applying this product was a breeze, even for someone like me who is not particularly skilled in car maintenance. Plus, I've been using it for several weeks now, and I'm thrilled to report that my headlights have held up beautifully without any signs of yellowing or deterioration. In conclusion, if you're looking for a reliable and effective solution to restore and protect your headlights, look no further than Chemical Guys GAP11516 Headlight Restore and Protect. With its professional-grade results, all-weather protection, cost-effectiveness, and ease of use, it's no wonder Chemical Guys is the go-to brand in car care. Trust me โ you won't be disappointed!
C**A
Removes yellow haze
Works well headlights were much clearer. The yellow haze was removed but i personally think there are better products out there. No strange smells.
N**E
1967 boat restore
Awesome stuff! Applied this to our โnewโ 1967 boat windshield and it worked like a charm, with very minimal elbow grease. Didnโt have to use much of it, either. I wish I had a good before shot because the plastic was so cloudy we could barely see through it.
B**U
Works Very Well
Noticed cloudy headlights on my Jeep. I tried an over the counter liquid brand but it did not work. I am a fan of the Chemical Guys products, so I figured I would give these a try. I am pleasantly surprised. Bottle is sealed, so you will have to open the bottle and remove the seal on the inside... which required a knife. It wasn't easy to use a fingernail. Once opened it does not take much. 3 drops per the instruction per application. It is applied to the towel or pad and rubbed in. It takes a few runs and dries fairly quickly like car wax. However when you wipe the hardened part away, the glass will be clear. Works exactly as advertised. Worth every penny.
A**.
Works only half way - one cannot reach full clarity of headlight, and repair does not last long.
I used a different brand before, one of those which come with a set of polishing disks, a polishing solution, and you use a drill to gradually get rid of surface roughness. That one worked very well but it was quite of a chore. The idea of this one was attractive. Indeed, it works very clean to get rid of initial haze. However, it seems to be unable to reach a perfect clarity of headlights, and the effect of surface refurbishing fades away in 4-5 months. In a way, it is a quick and easy fix which takes you half way to full clarity of the headlights and does not last long. I am going to order a more reliable and proven replacement rather than using what I have left in the bottle of this one (which is almost the full bottle...).
W**T
THIS STUFF REALLY WORKS!
I rarely write reviews, but I have been disappointed by so many headlight restoration products that I felt compelled to share that THIS STUFF REALLY WORKS! Frankly I was skeptical, but since most Chemical Guys products that I have used have lived-up to their hype I decided to give this a try. When I read the directions and saw that sanding might be required for the worst case headlights I thought "Yep, here we go again!" I tried this product on a 2015 Lexus SUV, a 1998 Porsche Boxster, and a 2004 Chrysler Crossfire. It produced dramatic results the first try with each vehicle, and in the case of a truly hazy headlight, the second application finished the job perfectly. It did not take a lot of heavy scrubbing or buffing, and produced equally good results when applied by hand and with a machine buffer. I am a car guy and somewhat obsessive about clean well-detailed cars. There might be some headlights that this product won't restore, but it sure as heck worked on mine. I highly recommend giving it a try! And - NO - I wasn't compensated for this review in any way.
M**H
Let there be light.......
I've been using this product for a while, but have never written a review. This product does work, and in the world of "Polishes" and trying to figure out which grade or grit you need, this is nice cause it's just the right grit rating to do a complete job relatively easily. To Start: PREP0: Open the hood of our car or truck, that ensures you get the best access to the headlight lens, including the top. PREP1:Obviously make sure the lens is clean, which you can do just using window cleaner or after you washed the car or took to the car wash. PREP2: You want to remove the first line of "Haze" here's a trick, use WD40 or Ballistol.. Simply spray it onto a microfiber cloth and wipe down, you'll notice it takes off a layer, but not ENOUGH to make the lens clear, but it DOES help and sort of "Pre lubes" the surface a bit. ---Note -- IF the lenses are severely oxidized, like it's very rough and pitted to the touch, and almost completely faded out, you may need to do a wetsand prep using something like a 3000/5000/7000 grit sandpaper, THEN start the Chemical Guys' polishing routine with this product. This product won't remove that harsh first layer of oxidation, or it will take forever, as it's a very medium to medium fine polish. If you have to wetsand first, use a spray bottle of distilled water, wet the lens thoroughly, then first go with 3000 and work up to 5000 and maybe 7000, constantly lubing with water and wiping off the excess with a clean towel. After you go through the 3 stages then apply this Chemical Guys' polish routine. But, for most people they won't have to do this. But if you have to do this, prep3 is critical below: Masking. PREP3: TAPE: It's best to get some blue or green painters type masking tape and tape off the light from the painted areas of the car. Don't over think it, it's not like you're painting anything, you just want to mask off the painted areas from the headlight to keep the bonnet from bumping the paint. And from the material getting into areas you don't want to.. PREP4: HAND POLISH: If you're using a foam bonnet or a microfiber bonnet (or a towel) this will take longer, but you have more control of the "product" and it doesn't fling off. Simply put some on your foam bonnet and polish it in. Keep working it, and sometimes you can have a spray bottle of water to lubricate it a bit, and continue to work it in. Wipe it off, try a second coat doing the same procedure. Remove the tape, Let it DRY, then use a clean cotton cloth to remove the excess.. Cotton will not create the static like Microfiber does and it won't remove any protect layers of the product, leaving it treated, as this Chemical Guys' headlight restorer does have a UV protectant in it. If you don't have a cotton cloth, that's okay, just don't press too hard, just lightly buff it and remove the haze.. Voila.. Clear. PREP4A: MACHINE POLISHER. If you're using a rotary polisher, whether it's a large bonnet type designed to polish, or a smaller one, like a special tool that holds a 3" flat bonnet, or a smaller bonnet (Like the ones you use on Drills, the round type) you have to be a little more careful applying the product as it'll fling off and make sort of a mess. So you put it on the flat or round bonnet, spread it around on the bonnet and the lens and SLOWLY work it in, don't go full blast or you could possibly burn the plastic or the paint surrounding the headlight.. So you want to be careful not to hit the painted areas. HENCE the masking. Work it in slowly, and then gradually increase the speed.. You don't have to press real hard, as that just makes the bonnet lose control a bit.. Just a nice light pressure and allow the rotary device to do the work. Also, you can rest assured your polishing bonnet has probably absorbed some of the material, especially by the time you get to the 2nd headlight. That being said, you can continue to polish a bit without having to apply more product. This product seems to not dry too quickly and has a slight oily texture to it so you can work it in looking as though you don't always have to have a fresh "Haze" of the product on the light lens.. Again, if the bonnet is fairly saturated with product you should be good. Again, like above, you can also spray some water on it and continue you on that way as well. Be sure to avoid hitting the painted masked areas as much as possible, bumping them slightly won't really hurt it, but when you're increasing the speed just be sure to avoid them, you don't want to "burn" the paint. Remove the tape, let the product dry to a haze, and slightly wipe clean with a cotton or microfiber towel. Tip: I buy high quality paint brushes, like 2", 3" wide, the stubby kinds, which are great for after a procedure like this to wipe around the light lenses, to get any chalked product out. If you have an air compressor that's a bonus too. Just use the brush around the edges, then hit it with an air compressor.. Should look great. Like these: https://www.amazon.com/Wooster-Brush-Q3211-2-Shortcut-Paintbrush/dp/B099KL78FB/ref=sr_1_6?dib=eyJ2IjoiMSJ9.SUZ3kYDsniTGpWjAgfwOX1LQJ_Yq8wMpc0b83Zaw7faaGpmqa2xEHA1lQlXw8WCpNNesowQGa4tnPmKzSFUxH4WeQ-PxOS2JiXDG5OTNhlJEeCY26NFkoXBmclsJqhfi_V40EU8qRkS1Ma1pG7dJj_YrBToUPaKAtvF_K_rStd0c9Nw1bx6ZzDcodmc5RYwWr35jsUugVCnPN4B1GPu0DDxfKqTf9zxIzakWAGvtjGiZbORcA_bS276zEYyIe-AowBrSuZC0KrZ29lePdIzQagGLolWCuvOC7LTBLINBWe4.wRl7tSfIBoecdoW846dL8XItJGA-99c2tpA8mgHC09c&dib_tag=se&keywords=stubby+paint+brushes&qid=1733415295&sr=8-6
A**.
Excelente
Excelente producto, sirve muy bien para los servicios express que hago en los faros
J**N
The real deal...
Okay... so you've been surfing for a headlight restoration kit, and you see all these products that want you to do all kinds of sanding and polishing to restore your headlights. I have used a kit like that before--and it does the job. However, it takes a lot of work, and if you're not careful you can damage your headlight lens. I wanted something that could be used without sanding, and I ended up here. The process is dead simple... Put some of the product (which has a creamy texture) onto a microfiber cloth or similar, and then rub it on the lens. Once it has been worked in, use a clean cloth to remove any excess, and to polish the lens. Total time is 5 minutes. I'm attaching images from two vehicles I treated. One is a Ford Freestar (2007), the other is a Honda Civic (2009). I literally spent 5 minutes on each lens. If you have a buffer, that would be handy, but it's not essential. I did this on a sunny day, so that the lenses would be 'warm'. While I don't know if it matters, it certainly doesn't hurt. What I did notice was that the product worked best on lenses that were physically smooth. It's hard to see in the images, but the Freestar lens had more 'abrasion' marks, and didn't clean up as well. The smoother the lens, the better the outcome was. So if your lens has a lot of scratches on it, the performance of the product may not be as good. As for longevity, I have no idea, since I only did this a couple weeks ago. However, I've driven in the rain, and the lenses are still as good as they were when I applied it. In the end, it was certainly worth the money I spent for it--if for nothing more than the convenience of not spending a couple hours sanding my headlights. This is not a product for someone who wants 'perfection' though. The result is very good, but I suspect a kit with sandpaper would be able to get them 10% clearer. However, if you just want to get your lenses clear, you'll likely be happy with the performance of this product.
H**N
good
good
W**D
100 percent recommended
A perfect magic product it clears the headlights like a magic.
G**N
works well
good product
Trustpilot
2 months ago
2 weeks ago