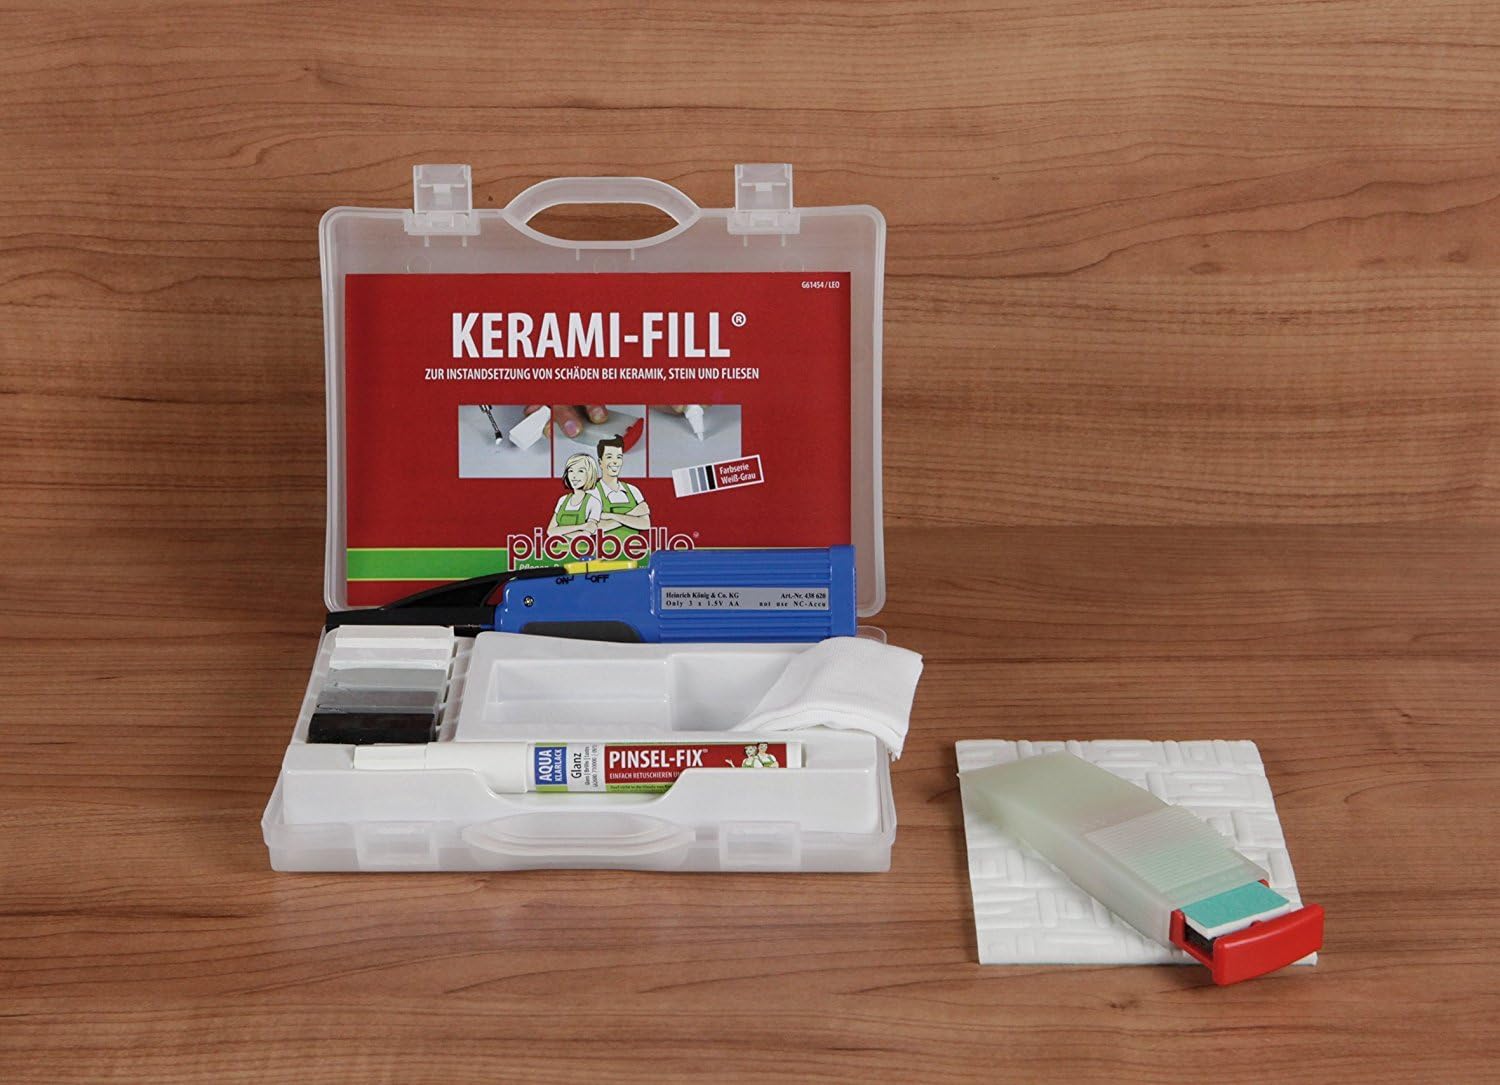

Picobello Ceramic Tile Repair Kit (White/Grey) by Konig by Konig
Product ID: 39553997
🎨Customizable Fillers
📏Precision Leveling Tool
🛠️DIY Repair Tool
✨ Repair, Revive, and Rejoice! ✨
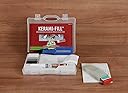
The Picobello Ceramic Tile Repair Kit by Konig is your ultimate DIY companion for restoring ceramic tiles in your home. This comprehensive kit includes a variety of fillers, a battery melter for easy application, and a leveling tool to ensure a professional finish. Designed for both functionality and ease of use, it’s perfect for anyone looking to enhance their living space with minimal effort.
| Manufacturer | Konig |
| Part Number | Ko61450 |
| Item model number | Ko61450 |
| Is Discontinued By Manufacturer | No |
| Size | full size |
| Color | White/Grey |
| Style | Compact |
| Material | Ceramic |
| Item Package Quantity | 1 |
| Batteries Included? | No |
| Batteries Required? | No |
| Description Pile | AA |
O**.
Works as promised.
Used to repair a grey tile and it worked amazingly well. They repair blended very well with the tile and is now almost impossible to spot. Mixing the right color takes a bit of experimentation but it is easy to continue working the spot until it is right. Our contractor was very impressed and said he had never seen such a good repair before.
S**N
BEST TILE FIX ON THE AVAILABLE!
I think the PICOBELLO system is the best system. The fillers are strong, durable and they include everything you need from the heat gun to the fillers, the plastic scraper which works much better than sand paper (I tried). It seems as you use their scraper back and forth, it helps blend and set the filler in some way. Then there is the top clear coat which you can adjust the sheen based on if you use the white or green side. It's amazing.So why not 5 stars?1. the heat gun needs to be hotter and the rod out of the heat gun on mine shaped off and I had to return it. A stronger design and hotter gun would require less pressure on from the gun to the filler bars.2. I think for the money, they should include all colors. As it is now, you can buy a grey set or the terra cotta set. Both should be included because some tiles require blending a little of the other set. In my case, my broken tile was predominently earth tones, but I needed a little white to and light grey to really nail the match. So I had to buy the not included filler kit for an additional $17. Bought the white/grey repair kit and supplemented with the terra cotta filler set.What's interesting is when it arrived, I couldn't find the terra cotta kit of 5 bars and thought Amazon forgot it or it was coming separately. When I opened the box I found that there is a compartment inside to hold these "extra" fillers which is where they were "hiding." So if I had to bet on it, I'd say that originally, the repair kit included both the grey and brown pallets, but for some reason they got separated.If it is simply a cost issue, which I would respect, then I would offer the repair kits in 3 formats:1) White/Grey2) Terra Cotta3) Combo all colors, but at a combo price less than buying 1 or 2 plus $17 more for the other filler kit.SUMMARY:Be careful when applying pressure from the gun to the filler bars. Let the tip sit on the bar and melt the sized portion you need. Don't push faster than it is melting. Depending on your tile color be prepared to buy the other filler kit. Best example is that if you get the Terra Cotta kit? You can't lighten it without white which is only found in the White/Grey 5 bar filler kit. But getting this kit will possibly save you looking all over for older or discontinued tiles, thus saving lots of time.Also, don't be afraid of making a mistake and not matching perfectly. You can always remelt the filler material you placed and add additional color to augment and get perfect.Lastly: I realized that if you need to blend filler bars to get your color, instead of doing this right into the hole you're filling, build a mound of blended filler over another area of tile that is the same color you need to match. This is easier to mix and add color to to blend easier. Once you get the portion needed to fill your area, then simply use a tool like a metal spackel knife or chisel to carefully push the mound off your tile, it does stick in your hole excellently but doesn't stick so you can't easily remove when on just the surface with no holes or cracks. Then drop the mound into your hole, it will not be the exact size of course, then use your heat gun to SLOWLY melt and shape the mound into the hole you're fixing. and then finish it per their instructions.OH: WATCH THEIR VIDEO on YouTubeFOR DEEP OR LARGE HOLES TO FILL:If your tile is not the same color all the way through so that putting in the mound which you matched so perfectly to the top color of tile that you ultimately want your filler to match, I would fill the hold almost to the top. Let it harden and then add more of your blended mound to finish off the fill. This way the blend you made, first mostly matches the tile even inside the tile, but then with that as the base, when you add the same material on the top of what you put inside, it will be interacting with your blend and not the lighter or darker color of the inner tile. Yes the inner filler may change a little because of the tile surround it, but this should be minimized when you add the "top coat" of filler. Worst case is you need to blend some extra color into the top coat to over come however the inner filler might have changed color wise. But you'll only be mixing a small amount versus the full amount to fill the entire hole and have that also work color wise for the top layer of filler material. I hope that ramble makes sense. You'll see it does if you have a big and or deep hole to fill.
S**N
poor quality, very short term (less than 30 days) fix.
Installed as per Instructions. Less than 2 weeks later all of the fill has come out and cracks/chips are back. I expected a much longer result.
J**A
Worth trying.
I believe the product is good in concept. And it worked according to the instructions without difficulty. The problem is I am working with narrow cracks that are not grooved meaning it is difficult to ensure the product stays in place with the abrasion that needs to be done to smooth the filler out. Also the colors provided do not match quite right and to mix them seemed a difficult endeavor. Bottom line, this takes some practice/skill in order to do a fairly delicate piece of work. I would not rule out anybody not trying this stuff for their particular situation. I intend to go back and try to improve on the job.
E**B
Amazing Product!
This saved us from having to replace our tile floor which had many cracks and HUGE holes from being chipped from various items falling over the years. Worth every penny if you want to save your tile floor! Super easy to use and blends right into any floor easily!
M**H
Pretty good
Overall, I would give this product a B+. I have the original 1962 gray floor tiles in my bathroom and around my tub. The Picobello kit takes patience, but I was able to match the floor tiles really well. You have to be on your hands and knees to see the repairs. The kit did not work so well on the vertical tub surround - the product kept popping out. I am not sure if this was because the tiles were vertical or if the chips were not deep enough. If I was willing to put more chips into the tiles, the Picobello probably would have worked better if I made the chips deeper with a narrow, porcelain safe drill bit. Here are some things to note:1) The heat knife does not work like a hot knife through butter. It is more like a hot spoon through solidly frozen ice cream. You need to move the knife slowly and allow the product to melt along the way. Otherwise, the knife will slip off the wax block and hit you thumb and burn you. (Happened to me - choice words were spoken).2) The "gloss" top coat is not glossy - more of a satin. If you have high gloss tiles (like I do around the tub), this is a noticeable difference. You may want to not use the top coat or dot a drop of clear nail polish over the repair. Also, the glossy top coat seems to make the colors darker. You may want to test this yourself, but I ended up making my repair "lighter" knowing the top coat would "darken" it.3) The white block is not pure, bright white. It has some gray in it. So if you try to use it on bright, white tiles like I did in my second bathroom, you are going to have a repair that looks like a dirty spot on the floor. If Picobello could make a bright white color, I would buy it in a heartbeat.Overall pretty good product. Great for gray or darker floor tiles.
C**N
Really nice.
This takes a bit of trial and error, but you're not going to make a mistake you can't correct.I was filling in holes that had been drilled in my tile from a towel rack. I can see the holes because I know where to look but the are almost imperceptible to the untrained eye.This is a great product and saves a lot of time having to replace a tile or two that may have become damaged.
M**E
One Star
no it was a waste of money.
Trustpilot
1 week ago
2 months ago