Description
🚀 Elevate your projects with pinpoint motion precision!
- PROVEN RELIABILITY - Join 800+ satisfied makers leveraging this top-rated sensor for drones, robotics, and more.
- WIDE GYROSCOPE RANGE - Customize sensitivity with selectable ±250 to ±2000 °/s gyro ranges for any project scale.
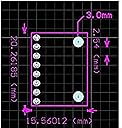
- COMPACT LIGHTWEIGHT - Sleek 1x1 inch silicon module fits perfectly into your modern DIY or professional builds.
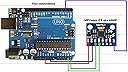
- PLUG PLAY I 2 C INTERFACE - Effortlessly connect with Arduino and other microcontrollers using standard I2C protocol.
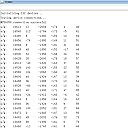
- PRECISION MOTION TRACKING - Experience ultra-accurate 16-bit sensor data for flawless motion detection.
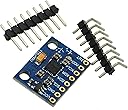
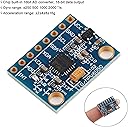
The Gy-521 MPU-6050 module combines a 3-axis analog gyroscope and 3-axis accelerometer with a built-in 16-bit ADC, delivering high-accuracy digital output via I2C communication. Powered by a 3-5V supply with an internal low dropout regulator, it supports multiple gyro ranges (±250 to ±2000 °/s) and accelerometer scales, making it ideal for Arduino-based robotics, drones, and motion sensing applications. Compact, lightweight, and backed by a strong user community, this module is a must-have for precision motion tracking.