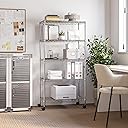
TL;DR: Buy these shelves. It's super easy to put them together and oh, the space you will have. The Elle-aboration: I'm a small female living in a small apartment with NO storage. It's been driving me nuts, so I finally took the plunge and ordered three sets of these shelves - two for my walk-in closet that I finally reclaimed from my cats and one for my pantry. I was worried about the weight of the shelves - how to get them up the stairs, how to unpack them. I was worried about doing this alone. If those are your concerns, worry no more. Here's why: 1. Yeah, the boxes themselves are 30ish pounds. Thankfully, UPS delivered them to my door, but even if they hadn't, I could have cut the boxes open and carried them up the stairs in a few trips. Do not let size/weight of these puppies deter you. Although I'm a little scrappy, I'm also a 5'2" female, well over 40, and wear a size 4ish, and if I can do it, you can do it. 2. The shelves are super easy to assemble and lift. Even doing it by yourself. Even if you're on the smaller side and unhulky. Even if you're afraid of using wrenches and totally confused by lefty-loosey, righty-tighty (because eventually everything goes left and everything goes right so really...?). Even if you watch the videos and wonder if you can do that. You can. DO NOT FEAR THESE SHELVES. There are some tricks I'll share for how I did it in 10 minutes, first time out of the gate (or box, actually). The trick is to stay organized and begin on a waist-high horizontal surface. Not the floor. Here are the steps I followed that made it super easy: 1. Unwrap and keep your bottom rods and top rods separate, just to stay organized. You'll receive 8 rods (4 top, 4 bottom). The bottom rods are where you put the feet or rollers, and there's a small hole where both will fit. You'll know it when you see it because the pieces are well-organized by the manufacturer. (Thanks, Seville!) 2. Put the feet or the rollers into the bottom rods. I didn't even have to use the little wrench thing, but it's super easy to use, too. Put the round plugs into the top rods. Once you do that, you'll notice that both have holes with threads in them. That's where you're going to put the screws that hold them together, but don't do that yet and keep them separate. 3. Decide where you want your lowest shelf to go and then take two of the black clamps that stabilize the shelves, make sure the arrow and "TOP" marked on each clamp are facing up, and clip them at the same time onto the rod. You'll notice there's a little line on the plastic pieces, and then there's the line on the rod. When the line on the plastic pieces line up to the line on the rod, they will click with each other. You may have to move them until you hear them click onto the rod. The first time you hear the click will be bliss because you'll know you've got this! 4. Put that first bottom rod onto a horizontal surface, and then take your next rod, find the identical line, and place another set of clamps. If you work on a horizontal surface with the rods lying down, it's so much easier than counting lines and spaces. You can just line them up side-by-side, so much easier, and no crawling around on the floor. 5. Put the clamps on the remaining two bottom rods, again working on a horizontal surface. When you finish, you can line the four bottom rods up side-by-side and (check) enjoy the symmetry of your excellent work. 6. Take your first shelf (make sure you have it facing the right way), turn it sideways (as in put one of the long narrow sides of the shelf) onto the same horizontal surface, and slide the rods through that way. No lifting, no holding it up, no balancing on the short end. Take the easy way out. Once you slide all four rods though, you can set your shelf on the floor to feel good about yourself, but don't. 7. Keep the shelf on its side with the four rods sticking out and place your second set of clamps onto each rod. It's much easier than trying to do it while the shelf is standing, and you can line them up visually. 8. Slide the next shelf on the same way. Check to make sure that the two shelves are level (they are), and then once you have the two shelves in place, you can stand the whole thing on the floor, push the shelves down firmly, and finish the job. 9. The third shelf is the trickiest because you have to decide if you want it on the bottom rod or on the top rod. The only reason this matters is because if you want it below the second rod, you'll put the clamps and shelf on before you screw the two rods together so that you're not trying to shimmy it all the way down. (I put my third shelf on first). 10. Next, you have to screw the rods together. I was worried about messing up the threads because of one of the videos, but don't be. Just take your time. Put the threaded metal piece into the bottom rod, screw it in, and then screw in the top rods. All four rods will be securely in place and ready for the remaining shelves. 11. All you have left to do is put your black clamps on and slide the rest of the shelves into place. You'll be working at eye level, so it's easy to line them up visually, the shelves aren't heavy, and it's maybe two minutes from this point. I found it very easy to do this way, maybe 10 minutes total?, and I know I'd have gotten frustrated crawling around on the floor and/or trying to do it vertically at the beginning. Counting the rungs and visually lining them up from above, no thanks. Ditto with shimmying them down the rods. Just no. (Editing to add: I did try one on the floor just to see, and no, no, just no.) Also, a couple of other things if you live in earthquake country like I do: I put my bottom shelf at the very lowest rung and plan to place heavy items at the bottom and a wedge underneath to keep it from tipping. I put my top shelf about four rungs down so that I can use it to place things and I can secure those things with an outer strap. Then I can use earthquake straps to secure the top of the rods to the wall. IDK if these instructions will help anyone, but I wish I'd known how really easy this was. All the videos I watched made me a little wary. Several said that it's easier with two people, someone actually screwed up the threading on the rods, someone else got their clamps misaligned, etc, and all that made me dread the undertaking. As soon as I started, I realized that waist-height horizontal surface and organization were the keys to fast success, and so I had to share in case it helps someone else.