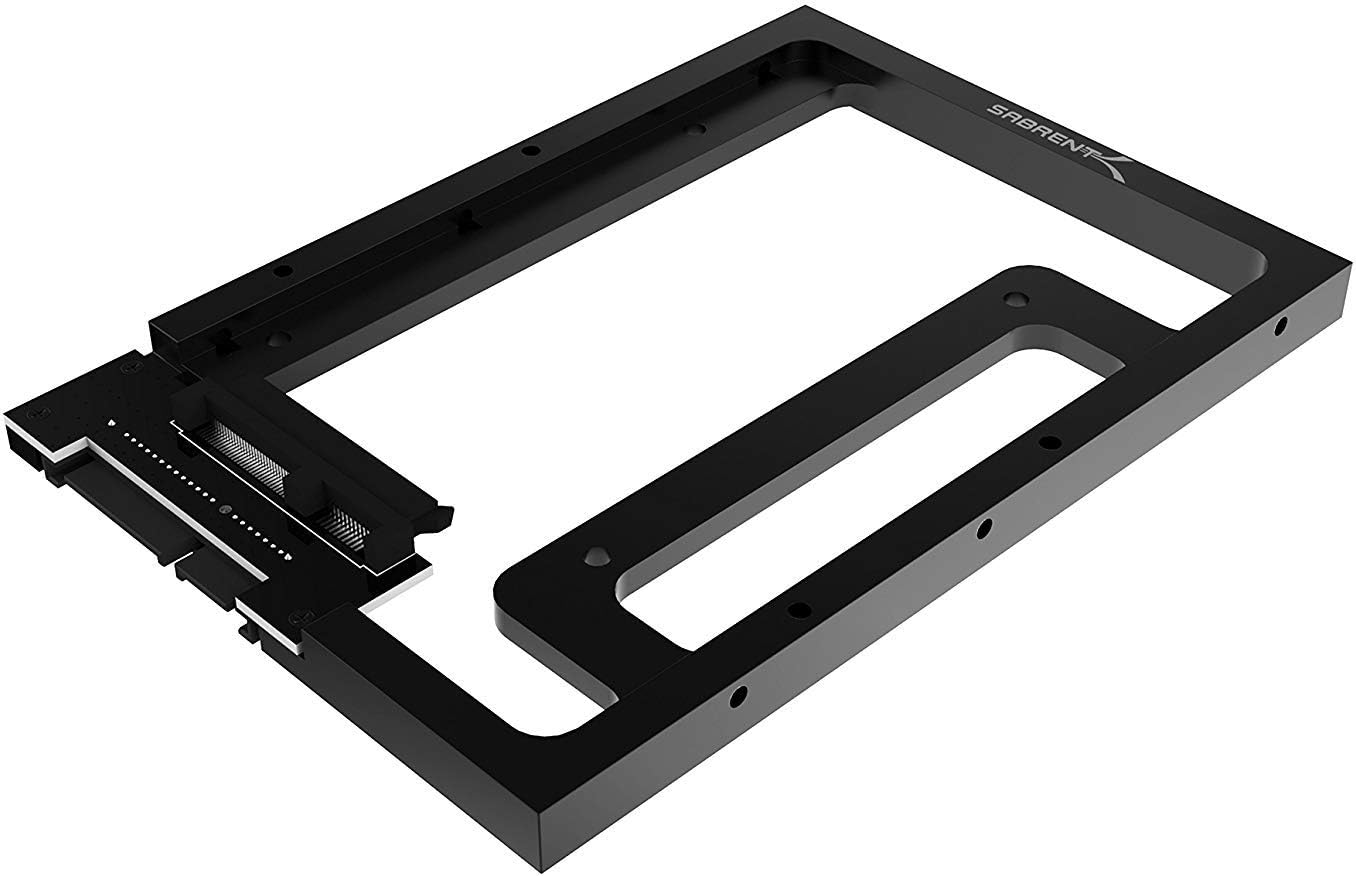
Sabrent 2.5” SSD & SATA Hard Drive to Desktop 3.5” SATA Bay Converter Mounting Kit (BK-PCBS)
Product ID: 253705839
Details
- BrandSABRENT
- Colour2.5" Hdd Ssd
- Item dimensions L x W x H17.9 x 1.5 x
- Item weight113 Grams
- MaterialAluminum
⚡SATA 3.0 (6Gb/s) speed
💾2.5" SSD/HDD compatible
🧊Aluminum frame for cooling
11921CFA
1
Sold byAmazon SenegalDelivered byDesertcartCustomer service byDesertcartReturns14 days · 30 with PRO
Buyer Protection · Full refund if your order doesn't arrive as described.
Desertcart purchases this item on your behalf and handles shipping, customs, and support to Senegal.
Secure transaction
Details
- BrandSABRENT
- Colour2.5" Hdd Ssd
- Item dimensions L x W x H17.9 x 1.5 x
Description
💼 Upgrade your rig with sleek speed and cool confidence!
- LIGHTWEIGHT YET DURABLE - Solid aluminum build weighs just 113g, combining strength with sleek minimalism.
- OPTIMIZED COOLING DESIGN - Open aluminum frame ensures your drives stay cool under pressure.
- PLUG AND PLAY SATA 3 0 SPEED - Experience blazing-fast 6Gb/s data transfer with full backward compatibility.
- EFFORTLESS DESKTOP INTEGRATION - Transforms your 2.5" drive to fit perfectly in any 3.5" SATA bay—no adapters needed.
- UNIVERSAL 2 5 DRIVE COMPATIBILITY - Seamlessly fits any 2.5-inch SATA SSD or HDD for ultimate flexibility.
The Sabrent BK-PCBS is a precision-engineered aluminum mounting kit that converts any 2.5-inch SATA SSD or HDD to fit into a standard 3.5-inch desktop SATA bay. Supporting SATA 3.0 speeds up to 6Gb/s and backward compatible with older SATA versions, it ensures high-speed data transfer while its open-frame design maximizes airflow for optimal drive cooling. Lightweight and durable, it’s the perfect upgrade for professionals seeking reliable, efficient storage integration.


Specifications
| ASIN | B00UN550AC |
| Best Sellers Rank | #74,715 in Computers ( See Top 100 in Computers ) #139 in Mounting Brackets |
| Brand Name | SABRENT |
| Color | 2.5" Hdd Ssd to 3.5" |
| Country of Publication | China |
| Customer Reviews | 4.7 4.7 out of 5 stars (6,413) |
| Finish Types | Black |
| Global Trade Identification Number | 00819921011886 |
| Included Components | Pack of screws |
| Item Depth | 7 inches |
| Item Dimensions | 17.9 x 1.5 x 10.7 centimeters |
| Item Weight | 113 Grams |
| Manufacturer | SABRENT |
| Manufacturer Part Number | BK-PCBS |
| Material Type | Aluminum |
| Model Number | BK-PCBS |
| Mounting Type | Tabletop Mount |
| Set Name | Single Unit |
| UPC | 819921011886 |
| Unit Count | 1 Count |
Common Questions
Yes, all products are sourced directly from authorized retailers in the US, UK, UAE and India. We maintain strict quality control processes and verify each product before shipping. All items come with applicable manufacturer warranties and are covered by our standard return policy.
Delivery times vary by destination country, typically ranging from 3-9 business days. Each order is fully trackable through our system. We handle all customs clearance and use reliable courier partners for last-mile delivery. You'll receive regular updates about your order status via email and our app.
Desertcart is an international e-commerce platform operating since 2014. We securely process thousands of orders globally each day. Every product goes through our quality verification process before delivery, and we provide end-to-end order tracking, 24/7 customer support, and a comprehensive returns policy to ensure a safe shopping experience.
Our prices include the product cost, international shipping, import duties, customs clearance, and local delivery charges. We handle all customs and import procedures, ensuring there are no hidden fees upon delivery. PRO members receive additional benefits including free shipping.
Trustpilot
TrustScore 4.5 | 7,300+ reviews
Shop Global, Save with Desertcart
Value for Money
Competitive prices on a vast range of products
Shop Globally
Serving millions of shoppers across more than 100 countries
Enhanced Protection
Trusted payment options loved by worldwide shoppers
Customer Assurance
Trusted payment options loved by worldwide shoppers.
Desertcart App
Shop on the go, anytime, anywhere.