Desertcart purchases this item on your behalf and handles shipping, customs, and support to Senegal.
🏍️ Transform your Ninja 650’s rear end from bulky to sleek—ride with style and confidence!
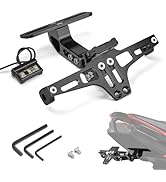
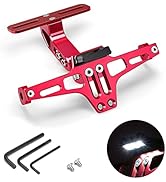
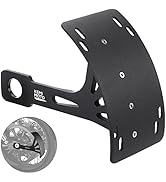
The KEMIMOTO Fender Eliminator is a precision-engineered tail tidy designed exclusively for Kawasaki Ninja 650 and Z650 models from 2017 through 2026. Constructed with anodized aluminum and stainless steel, it offers superior durability and a premium finish that resists oxidation and scratches. This fender eliminator supports original and aftermarket turn signals, includes a protective rubber ring for cables, and installs easily without full tail disassembly, making it the perfect upgrade for riders seeking a clean, aggressive rear profile.


| ASIN | B083JX8CWC |
| Auto Part Position | Rear |
| Automotive Fit Type | Vehicle Specific Fit |
| Best Sellers Rank | #80,097 in Automotive ( See Top 100 in Automotive ) #12 in Powersports Fender Eliminators |
| Brand | KEMIMOTO |
| Brand Name | KEMIMOTO |
| Color | black |
| Compatible with Vehicle Type | Ninja 650 Z650 ZX650 2026 2025 2024 2023 2022 2021 2020 2019 2018 2017 |
| Customer Reviews | 4.7 out of 5 stars 755 Reviews |
| Exterior Finish | Stainless Steel |
| Fit Type | Vehicle Specific Fit |
| Item Dimensions | 9.06 x 5.91 x 7.48 inches |
| Item Weight | 0.33 kg |
| Item dimensions L x W x H | 9.06 x 5.91 x 7.48 inches |
| Manufacturer | KEMIMOTO |
| Manufacturer Part Number | ff1710-00301bk |
| Material | Rubber,Steel |
| Material Type | Rubber,Steel |
| Model Number | ff1710-00301bk |
| Number of Items | 1 |
| Style Name | Modern |
J**P
Looks like a Sport Bike should!
2021 Ninja 650 from the factory looks aggressive until you get to the back and see that elephant trunk sticking out! Lol Now the bike looks like it should have from the factory to begin with! Awesome product. Watched a YouTube video how to install it. Took 40 min to install. I'm very hands on and have electric tools but had no clue how to do this without following steps first. Take your time removing the pieces off the bike and make sure you position then into place. This piece fit like OEM! 👍🏼
T**D
Fits 2024 Kawasaki Ninja 650 / Looks Great
This plate holder looks great. Very easy to install. You do need to understand how the side signals are squished fit into place. Just look at them when you take them off the original stem. Don't forget to put the plastic piece back in the inside. That's why that other guy's signal fell off. This fit my 2024 Kawasaki Ninja 650 perfectly. The original wires are a bit of a pain, but not difficult. You don' have to take off all of the panels like several others mentioned. There is one screw that is screwed into the plastic only underneath. You can just pop this out by pulling on it. You don't need to take the whole tail apart. But it's up to you. If that freaks you out, then take the tail apart. Both ways work fine.
R**I
Well worth the money
This item fits perfect and greatly improves the clean up of the tail piece. The original is ugly and too big. There are no instructions included, but go on line and you will see how to install. Takes about 45 minutes taking your time. Very solid and good quality. Great price point.
A**R
Clean look, easy install
Looks great on my husband’s 2025 Ninja 650—perfect fit. Just watch a couple install videos and label the indicator wires to keep it easy.
D**L
Awesome !!!
Perfect fit and excellent!!!!!
R**Y
Rugged Bracket for that Clean Look
This bracket brought better looks to my bike for not much cash. Getting rid of that long plastic tail made my bike look sleeker and even a bit smaller. I like the minimalist styling on my naked bike, and was glad to see I could get this mod done so cheaply. As someone in metal stamping, I can say the construction is solid for what it's made to do. Installation is very straight forward, with the hardest part being squeezing the factory mounting grommets in, followed by removing the stock tail. There's a screw holding the stock one on even after you remove the bolts. It's under the frame bracket, so you either put a screwdriver through a hole and bend the under cover down until you can get it, or you can go under it with a low profile driver. I used a bit in a ratchet. Take the brake light off to let that cover down. Other than that, it's just shove in the lights, fish the wires, and tighten the nuts on the studs. My only negative is that it was slightly too big in the corners to fit the indentation in my 2019 Z650. It's just a bit too sharp in the corners and hangs up on the larger rounds in the plastic on the bike. I went for it at first, but the tightening felt too progressive, and I redid it before I dug in. A few washers stacked around each stud for spacing and it tightened up quickly (as a solid stack should). Still looks great. I might have also designed it myself with headed clinch studs for holding power. Nothing broke, but I couldn't help thinking the flush stud might pull out if I happened to overtighten. Likely not an issue if you don't overtighten.
J**H
Excellent value for money.
This tail tidy is an excellent value in my opinion. My goal was to keep all the original OEM wiring and lights intact, and this product allowed me to do that.
C**S
2023 Ninja Kawasaki 650 KRT
I can confirm that this does fit the 2023 Ninja Kawasaki 650. I have the KRT edition, but that just means it has cooler stickers than yours and the stickers add a ton of horsepower lol. This is a solid piece of hardware! It was a pain in the butt to install given I have never modified a motorcycle before. Videos help so make sure you watch videos. Don't rely on the directions if you have never done this before, but if you have, you probably don't need them anyways. You do have to removing the rear side fairings. Just a tip, there is a screw that holds the OEM fender that requires you to remove additional pieces, but I took a longer screwdriver and pushed the plastic piece downwards and I was able to remove it that way. You won't be reusing that screw so add it to the "I have no idea where that screw came from" pile. I do have to point out that the plastic on the underside of the seat closest to the front does not allow this hardware to fit flush, but it is still fairly snug (picture). The rear edge of this hardware has a 45'ish degree cut and it fits perfectly. You also end up with lots of extra wire given that it is now a foot closer, but lots of room to fit the additional wire. I saw in a few reviews that a turn signal light had fallen off, but I am chalking that up to user error...sorry. Make sure you utilize the turn signal hardware from the OEM fender. It's a type of washer that pushes the rubber outwards so it doesn't pop out of the channel. The piece with the screw guarantees that it will stay in place. A tip is to put the wider side of the rubber through first because it made this part a heck of a lot easier. I spent a good 20 minutes trying to attach the first one. I was able to get the second one attached in a few minutes after realizing this. Make sure you also keep track of your screws because you will end up with extra screws and you might freak out if you don't. For me, I ended up with 4 extra screws that were attached to the seat since the hardware replaces those 4. Depending on your taste, some of the reflectors are also removed. I added what I could to give me the extra visibility. All in all, I am very happy with how it how it looks after installing this.
W**O
Excelente material
Material muito bom, encaixou certinho e fácil instalação. Sem necessidade de fazer adaptações.
C**S
Cleans up the back end very nicely!
I hate how ugly the stock license plate fender looked on my Ninja 650, so I decided to finally do something about it. Installing this new fender itself was very easy and straightforward. However, the process of dismantling the rear of the bike, disconnecting the lights, and removing all the parts to actually ACCESS where you need to work, was incredibly frustrating. Especially for someone like me who has never tried this before. I highly recommend following a YouTube video on how to take everything off. You’ll need multiple allen keys and ratchet tools of different sizes. Also, the very last Phillips screw at the bottom of the stock Ninja 650 fender is annoyingly hard to reach. You’ll need a long skinny Phillips/flat head screwdriver to reach it. Thankfully, the Kemimoto fender eliminates the need for that final screw. This kit includes bonus screws, but you won’t need most of them. You can reuse the screws that came from the original fender. As you can see in the picture, the Kemimoto fender eliminator looks amazing once installed, tidying up the back of your bike. For reference, I am riding a 2023 Kawasaki Ninja 650, and the license plate sits snugly underneath the taillight.
A**.
High Quality Z650 Fender Eliminator, AAA+++
K**E
makkelijk om te bouwen
past pefect op kawasaki Z 650 2024
T**R
Great fit and looks great
Bit of a more in depth install due to having to find your signal and plate light connectors but pretty straightforward and easy to install. Cleans up the back of the bike and looks great
Trustpilot
2 weeks ago
2 months ago