Desertcart purchases this item on your behalf and handles shipping, customs, and support to Senegal.
🪟 Seal the chill, save the thrill — your windows’ new power move!
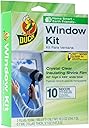
The Duck Brand Indoor 10-Window Shrink Film Insulator Kit offers 62 by 420 inches of crystal-clear heat-shrink film and 168 feet of double-sided tape, designed to insulate up to ten 3'x5' windows. This easy-to-install kit creates an airtight barrier that blocks drafts and reduces heat loss, significantly lowering energy costs during cold months while maintaining window visibility. Its rolled film format simplifies application, making it a smart, eco-friendly solution for millennial professionals seeking efficient, affordable home weatherization.


| ASIN | B002GKC2GW |
| Best Sellers Rank | #50,820 in Tools & Home Improvement ( See Top 100 in Tools & Home Improvement ) #33 in Weatherproofing Window Insulation Kits |
| Brand | Duck |
| Brand Name | Duck |
| Color | Clear |
| Customer Reviews | 4.4 out of 5 stars 19,829 Reviews |
| Global Trade Identification Number | 00075353090787 |
| Included Components | Plastic Shrink Film, Window Kit Tape |
| Installation Type | Heat Shrink |
| Item Dimensions L x W | 420"L x 62"W |
| Item Type Name | Insultation Kit |
| Item Weight | 9.6 ounces |
| Manufacturer | Shurtape Technologies |
| Manufacturer Part Number | 281506 |
| Material | **Please Note: the 2023 version is rolled film, not folded** |
| Material Type | **Please Note: the 2023 version is rolled film, not folded** |
| Model Number | 1163221 |
| Number of Items | 1 |
| Number of Packs | 1 |
| Product Dimensions | 420"L x 62"W |
| Size | 10 windows |
| UPC | 075353090787 |
| Ultraviolet Light Protection | False |
| Unit Count | 180.8 Square Feet |
H**Y
Not that difficult, huge difference in draftiness
I highly recommend you read the entire directions, and also the other reviews. By reading the very helpful reviews I was able to learn from people who have done this before. It was so worth the time. Speaking of time... that's really the main thing you want to dedicate to this cause - time. If you rush it, it will be unpleasant and not work well. Get your hairdryer ahead of time. Clean and dry the areas to be sealed. If you are doing an old-fashioned door with a checkered=pattern window, like me... Measure/cut to leave enough extra to seal over the grille [cross pieces on the glass]. I just covered my windows on the front and back door that have the glass checker-board panes. I had to cut the tape into 12 pieces. With this type of application the tape had to go on the glass instead of the sill, because the sill is about 50 years old and if I rip off the paint, there is gonna be hell to pay. No worries. It worked on the glass and the draft stopped immediately. There is an issue I can see, and it was mentioned by other reviewers... You may need to use more tape than provided because in some cases the tape gets touched and loses it's stickiness before you are ready to seal the plastic. No worries, just put another piece of tape and don't touch, put that plastic on fast and don't get too many finger-prints on everything as you try to size it. Fingerprint grease is obviously a glue destroyer. For that it's best to do one section of tape at a time. I've done four windows [counting the two doors as one window] so far and still have plenty of tape left. For best adherence, use the dryer to warm the surface you are applying the tape to, especially if it's glass. Then use the dryer to warm up the tape just before you press the plastic onto it, but not too much or it will dry out. The good thing is that this isn't like saran wrap - if the plastic folds on itself it doesn't stick - hence the tape. I also covered 3 regular, modern windows where I could put the tape directly on the clean sill. Worked great, piece of cake. As far as how much of this stuff there is... definitely enough for 5 windows. In my case I've used scraps on the back door - piecing two remnants from the other windows onto this one, since it's rarely viewed it doesn't need to be perfect. It turned out pretty good and that means you can make at least six window covers if you are willing to be creative. One more thing if you do have very leaky windows like these old doors I'm talking about, you may see what I see... that is condensation pooling at the bottom of the plastic which is pulling the plastic away from the glass in those sections. The way I see it... That is condensation that would be in my house, I'm glad that cold water is in the plastic and not in my air. However that does mean that in order to keep the doors from getting more rickety than they already are I have to sop that water up from time to time... and perhaps replace the tape every so often. No worries. The main thing is my heater goes on about half as much as before. I haven't got an electric bill since installing, but I don't think it's rocket science - that's got to translate to savings worth more than the $8 this kit costs. I will never go a winter without it again. Even if there was no cost savings, not having an uncomfortably drafty house is priceless.
D**B
Easy to use! Plastic on a roll not folded sheets!
I haven’t had the need to use plastic over windows in awhile. The kits used to come with folded sheets of plastic. This kit actually comes with a roll of plastic. It is so much easier! You start at the top corner and roll it across, then just unfold it down the window. It’s so much easier to maneuver. It has made such a difference in room temp, it’s crazy. My living room was actually at 49, with this plastic up it fluctuates between 68-70 now which is perfect. I’m planning on leaving it up for summer to keep the heat out and lower my a/c costs! This is a great kit, easy to use and works great. They also give you plenty of tape which is very sticky and the plastic is strong and very clear also.
A**D
Work at preventing condensation
Because we have a 150 g tank in our home, and we live in a cold climate, AND we have old windows, we tend to get A LOT of condensation on our windows, which often freezes over in the middle of the winter on our coldest days. The condensation was leading to pooling of water on our wood windows and causing mold to grow- not great, so I was pretty desperate. I was honestly a little bit dubious that this product would help, but I decided to give it a go because I wanted so bad for SOMETHING to work. I'll start with what I liked: I was actually AMAZED with how well these worked. Before we would feel a cold "draft" (not sure it was cold air blowing through or just colder because the windows are so bad) next to the windows. This significantly cut down on that- there was a noticeable temperature difference using the plastic sheets. Because of this, it also reduced the amount of condensation we saw and although there was still some water on the bottom of the plastic film, there was no where near the amount we saw without it. This is such a significant win, I would sing the praises of this product from the mountains and recommend it to anyone who lives in a colder climate. However, with those praises, there are a couple of caveats (but with all the caveats below, I would still only dock a single star, that's how much I would recommend this film!). Caveat 1: eco-friendly aspect. Increasing heat efficiency is an eco conscious move, I just wish I didn't need to buy (and subsequently throw away) a bunch of plastic to do it. I don't know that there is an easy fix on this fact without just buying all new windows. Caveat 2: tape- they do NOT send you enough tape to do all your windows with the film (I ran out of tape much before running out of film). BUY EXTRA TAPE, you'll need it. Caveat 3- application- it actually isn't that easy to apply at first (by the last window in my house, I was a pro) and the directions aren't really all that helpful. A couple of my own (from trial and error) recommendations: 1. Cut out the film first- I would recommend measuring your window and then increasing your measurements by an inch on either side. This gives you a little bit of a buffer, and you can always trim the edges off later. I found that it was very difficult to cut precisely and this gave me a little bit of wiggle room. Cut multiple pieces at once (if you have the same sized windows) by overlapping the film. 2. Add your tape to the window edges. I started on one side, added the tape, removed that backing. Then added tape to an adjacent side, removed the backing, etc. This made it easier to remove the backing (which was not as easy as you might expect). 3. Add the film to the window starting on the top and then pushing down the sides and finally on the bottom. 4. Use a HIGH HEAT blow dryer to shrink the film. Don't get too close because you can piece the film with the blow dryer. 5. Trim edges if you want 6. Do all of this on a warmer day (especially if you're concerned about condensation). This way, you won't trap extra moisture in between the glass and the film.
I**O
Freaking love this stuff
I love this stuff! It works perfectly for drafty windows - Like in apartments. Should also keep out bugs, dirt, and perhaps a light sound barrier. Installation is beyond simple. Anyone can do this, and alone. There is plenty of room for error. As it happens, I had perfect application on four 3x5 windows. Flawless. But, I want to talk about something that I've noticed a few others mention that I was curious about myself. (I got on here hoping to find an answer, and I didn't. So I'm going to try to answer it) The first day after installation of these, I noticed sound coming from them. It wasn't from *wind* like some people assume. I think it was a mix of static and tension, (and maybe sunlight?) Though, I heard it at night too. The sound - slow, soft crinkling of a potato chip bag.. Usually every 20 seconds or so. It's the time that leaves me to believe it's some form of static discharge. This went on for two days before I decided it wasn't 'settling' and I started to think of what was causing it. Well, if this were permanent, you can bet I wouldn't be giving this product 5 stars. So here's how I fixed it. Remember how I said I had a flawless application, but this product leaves room for error? (if you skimmed ahead, that's what you get for being impatient). Well, my application was too perfect. It was as tight as a drum, stretched all across each side perfectly. I had no problem removing an entire side at a time and repositioning it so it was half an inch closer to the window (loosening the fit). I didn't do this on ALL 4 sides, just two. After doing this, the sound was gone! Bam! It's still pretty tight, but nowhere like it was before. It still tight enough to where you can't see it unless you have a lamp in the reflection. Otherwise it's invisible. I'm not sure why or what combination of things caused the sound, but after repositioning it to be ever so slightly looser, all is golden! So my advice, Don't get it drum tight the first time around... And if you do, and experience this noise, just loosen a side or two and it should go away. To apply, I put tape on all 4 sides, then cut the proximal size of plastic, started at the top, and worked my way to the bottom. I didn't have any issues, but the tape is strong, sticky and forgiving. It sticks great to my paint, without removing it (the paint) , and can be restuck many many times as far as I can tell. I did it alone, and you probably can too. Two people would make it easier, but it isn't mandatory. Having a sharp pair of scissors comes in handy. To trim the excess, I didn't trim, but glided the scissors around to leave as clean of an edge as possible. I also didn't have a hairdryer, but I did have a space heater which worked perfectly, Probably better than a hairdryer. It came with two rolls of film. I did 4 windows and have enough left over from the first roll for one more window, and haven't touched the second roll. (Each roll should get you 5 windows, and I'm on track to get just that). I also have more than enough tape left over and have begun to use it for home projects. It's super strong, invisible, thin, and removable. I love it on it's own and would pay 10$ just for that. ****and if you want to get creative... Consider attaching a neodymium magnet to your blind controller in a fashion that could allow you to open and close them as desired, if you so wished! I haven't tried this but I know it would work with some creativity (perhaps super gluing a flat magnet to the base of the spinny thing (attaching it so the N/S polarity is horizontal/perpendicular to the thingy) .. So that you can manipulate it by rotating an equally strong magnet near it (while keeping them apart of course - using your hand as a barrier). If you've played with high powered magnets before, you'll understand how this could/should work. an interesting thought to fix the fact that you can't control your blinds once the film is on) Similar thoughts apply to attaching a magnet to the draw cords (though, they may be too heavy for such ambitious ideas) But adding a weight to the draw string could be a way to counter that. Who knows! I have one more window to do, and I will test this out myself and update with whatever results I have.. Even if they are just awful.
T**E
Works Great for Sealing in a Window AC During Winter
I bought the Duck Brand Indoor Shrink Film Kit because I really didn’t want to take my window AC unit out for the winter, and this has worked perfectly. Once applied, the film creates a tight seal and keeps cold air from leaking in, which makes a noticeable difference in the room temperature. The kit is easy to install — just follow the steps, pull the film tight, and use a hair dryer to shrink it. Even with the AC still in the window, the plastic tightened up smooth and clear. It also feels durable enough to last the entire season. If you’re like me and prefer to leave your AC in year-round, this is an affordable way to block drafts and keep your room warm. It does exactly what it’s supposed to do.
H**T
Good... BUT...
It works. BUT. Follow these pro tips for best results: 1.) lay the 2 sided tape. If you go ALL the way around your window in one fell swoop, use a razor blade and score the window corners. Every time there is a 90 degree angle, score this with the razor. The reason is this is an area of weakness, and if it is going to pull off the tape, this will be the first place because there's usually a bend in the tape here. Scoring the tape will prevent this. 2.) While using a blow dryer DOES tighten the plastic, and make it wrinkle free.... forget this step. It's nice for about 3 weeks, but once it gets cold, the plastic tightens more and pulls off in some places. Leave it wrinkly if you're putting these in to keep out cold. 3.) After you lay the tape and have your MEASURED section ready (give yourself 2-4 inches BEYOND you measured, put the plastic up 1" INSIDE the tape. This gives you room to move on the other sides while you put it up, and if you do decide to not listen to me in #2 above, it gives some play in getting it set the first time. Even without using a blow dryer to tighten, leaving a little play keeps strain of the double-sided tape, and keeps you from putting these up again in the winter. My windows suck and I can see the plastic move at times with extreme wind... but now with these up, my furnace can actually keep up, whereas it couldn't last winter. Last tip, don't get the Amazon Easy package, get the name brand (here on amazon too). You're just paying $3 more for a brown cardboard box rather than a duck brand cardboard box... ***update 11/30/18*** These are still good, and working well FOR THE WINDOWS I DID NOT TIGHTEN WITH A BLOW DRYER. I've had to re-tape almost every other window that I used a blow dryer on.... as it gets colder, the plastic tightens more and pulls off the sides in places Never mind using the blow dryer to give the crystal clear effect. If you are putting these o. to keep out the cold, just put them up with a little slack and you'll be fine.
S**T
Easy and effective. Will purchase again
This gives good amount of product and size for the price. I thought it was quite easy to install. I installed these in 2 bedrooms that have older vinyl windows that leaks a lot cold air in and loses a lot of heat. Our thermostat is also in a warm room so we get uneven heat throughout the house. I measured the width and rolled it downwards. My windows are on the larger size (34in width and 66inchs) Length, I extended 2 more inches on each side to install it on the window trims. I was able to install 2 of these windows and 1 smaller window( 36inx 24in). I went from top to bottom. I taped the 4 sides in sections and removed liner as I sealed. I didn't make it too tight initially and used a standard hairdryer and it shrunk it tighter fit. We live in colder climate where winters average around 30s F and down to 5 F on colder days. The plastic film maintained the temperature of the rooms 3-5 degrees higher. (without 63F with 68F). The thermostat is set to 69F (mind you that the thermostat is in warmer room)
R**E
Works great at blocking out cold air
I could immediately tell Erin was not getting through once I got this on a window. The room that's almost always extra cold was very comfortable. It definitely has a small learning curve to get the tape on just right, but once it's stuck, it sticks well. I didn't get the plastic on quite straight and had some pretty loose areas, but that didn't affect its ability to block out the air. I found that securing all four corners first really helps keep it straight. You can see right through it, so you don't have to worry about visibility issues. Once it was dry, it really felt secure. Overall, I'm happy with the results.
H**E
Seals in house temperature!
This is my first time using something like this but this window sealing kit has been great at sealing out the cold from our house! We have an older 70's house that still has the original windows (single-double pane, no insulation). Which is a killer on our heating bill here in Canada until we can switch out all the windows for newer ones. This sealing kit was super easy to install and is barely noticeable (the only noticeable part being on the window frame if you squint). Drastically could feel and see the difference it made to sealing in our heat! Even going as far as keeping our house from overheating too badly from the sun during hotter temperatures. Overall, would recommend!
L**A
Si sirve!!!
Este producto sirve para las corrientes de aire, no para el frío intenso. Te ayuda a que no haya una corriente en el cuarto que pasa de una ventana a otra cuando este cerrada, bloquea las corrientes, pero no el frío intenso ya que requiere de aislamientos especiales y con un costo mayor. Debemos entender para que sirve este producto. A mi me funciono.
N**N
High quality Thick film
This shrink film kit does an excellent job of sealing out cold air, making a noticeable difference in my basement—it’s now much more comfortable to stay in! The installation was straightforward, and the film shrinks nicely for a clear, tight seal. The only downside is that the kit comes with more film and tape than I actually need. It would be great if there were smaller size options. However, the extra materials could be useful for future use or larger projects. Overall, a great product for improving insulation and keeping the cold out!
S**X
Cheaper than double glazing.
No complaints with the installation, some of my windows are sliding sash windows so it was a bit fiddly to install but that's not the fault of the product. Pretty forgiving of bad workmanship as a blow with the hairdryer takes out the creases and gives a great finish. Definitely notice the difference in terms of insulation and sound proofing. Worth doing if you can't fit double glazing for any reason.
C**E
Excellent
Easy to use very effective keeps room warm also helps with road noise
Trustpilot
2 weeks ago
2 months ago